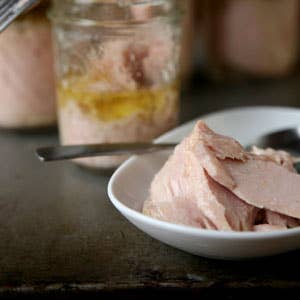
Home-canned, oil-packed tuna is sumptuous, flaky, and full of flavor—a world apart from most commercial versions. Tuna is a low-acid food, so it must be canned with a pressure canner, preferably of the weighted-gauge variety. The pressure creates a higher-than-boiling temperature that kills any bacteria that may cause spoilage.
Ingredients
- 2 1⁄2 lb. boneless skinless bluefin, yellowfin, or albacore tuna loin
- 3 tsp. kosher salt
- Olive oil
ADVERTISEMENTADAD
Instructions
Step 1
Bring a 6-quart pot of water to a boil. Place 6 half-pint canning jars along with their bands and lids in the boiling water for 30 seconds. Using tongs, transfer the jars, bands, and lids to a kitchen towel on a counter and let air-dry.
Step 2
Wash tuna; trim off and discard the dark blood line and any connective tissue.
Step 3
Cut tuna into 2 1⁄2" x 3" chunks. Pack the chunks of tuna into the jars, cutting them to fit as necessary, leaving 1" of space at the top. (Use any scraps of tuna to fill gaps along the sides of the jars.) Sprinkle 1⁄2 tsp. kosher salt into each jar and pour in enough olive oil to cover the tuna, leaving exactly 3⁄4" of space below each rim.
Step 4
Using a table knife, pry the tuna away from the sides of the jars to allow oil to fill any air pockets. Wipe the rims clean with a hot damp towel, seal with the lids, and screw the bands on.
Step 5
Put the rack in the bottom of a 10 1⁄2-quart pressure canner and place the sealed jars on top of it. Pour in enough boiling water to fill canner by 2" to 3". Lock the top of the pressure canner in place according to the manufacturer's instructions. Remove the pressure regulator cap or dial gauge from the steam vent and set it aside.
Step 6
Heat the canner over high heat, allowing steam to release from the vent for 10 minutes, in order to remove most of the air from the canner. Carefully cover the steam vent with the pressure regulator cap or dial gauge. When the pressure gauge reads 11 lbs., process the jars for 1 hour and 40 minutes, adjusting the heat as necessary to keep the pressure at 11 lbs. If the pressure dips below 11 lbs., stop timing, bring the canner back up to the correct pressure by increasing the heat, and resume timing. (When using this recipe at altitudes of 1,000 feet and higher, add 1 more minute of processing time per 1,000 feet of additional elevation.) Turn off the heat and allow the pressure to drop to zero, 30–45 minutes. Remove the pressure gauge. Wait for 2 minutes, then lift off the top of the canner, taking care to avoid any residual steam.
Step 7
Using tongs or a rubber-handled jar lifter, transfer the jars to a kitchen towel on the counter and let cool for 12 hours. (If the jars are greasy, wipe them with a towel dipped in white vinegar.) Check the seals by removing the bands and lifting the jars by their lids. If the jars are properly sealed, the lids should hold tight. If the jar opens, refrigerate it right away and eat the tuna within 2 days. Otherwise, store canned tuna in a cool, dark place for up to 1 year. Refrigerate after opening.
Keep Reading
Continue to Next Story
ADVERTISEMENTADAD

