Jingalov Hats (Armenian flatbreads filled With greens)
- Serves
makes four 8-inch hats
- Time
1 hour 45 minutes
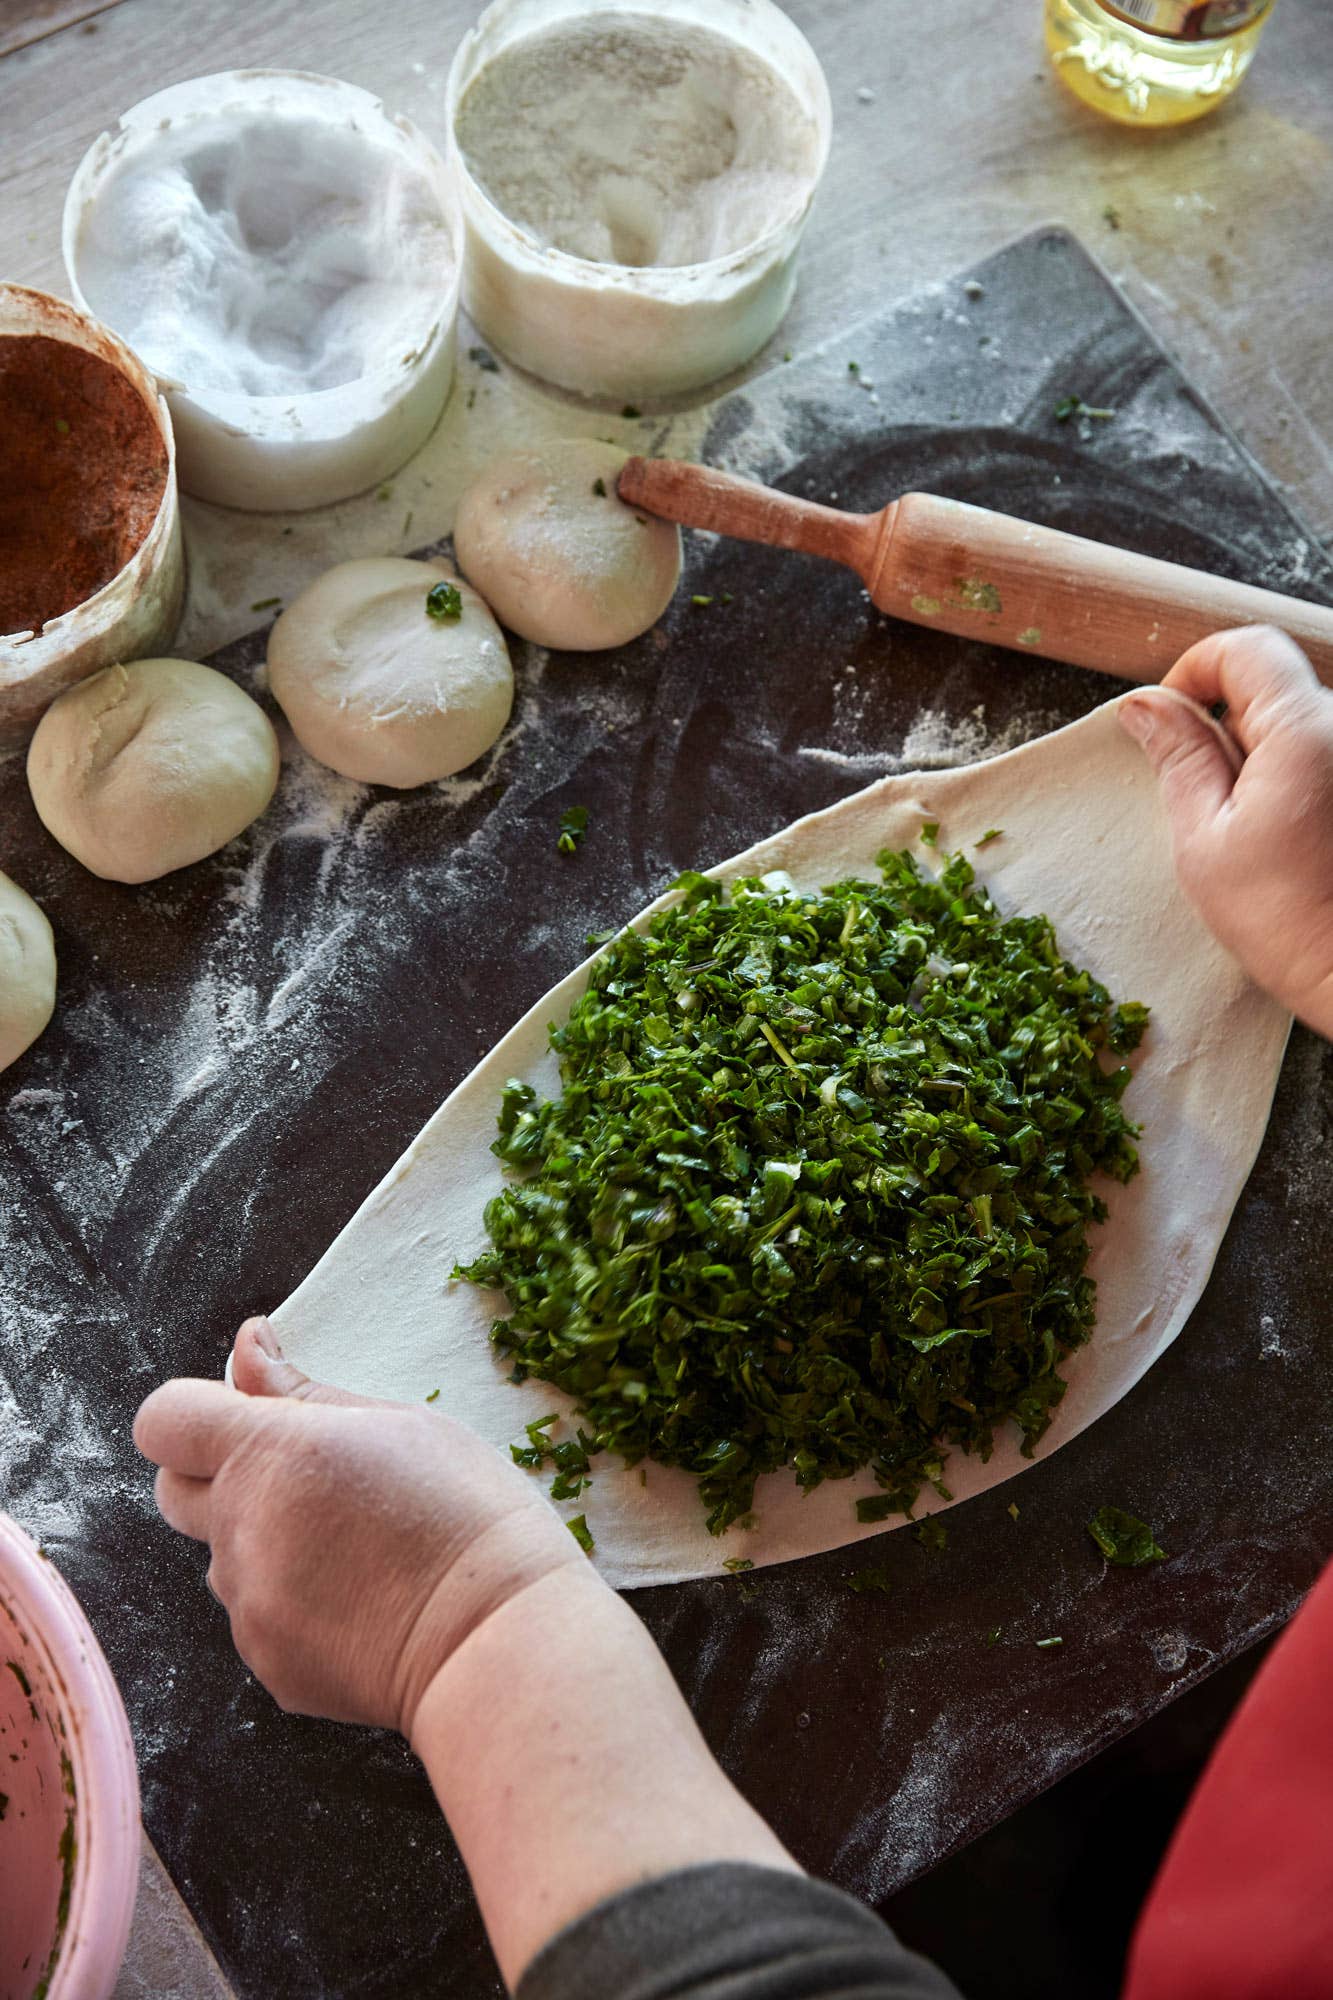
Old timers in Artsakh, Armenia, where this recipe originates, grumble that each generation gets lazier, adding fewer greens to the jingalov hats. Lilia Harutyunyanl, a native of the region, explains that achieving a balance in the mix of greens between the sour, sharp ones and the herby ones is more important. Add just enough scallions to lend flavor without overpowering the mix; round it out with greens from the neutral, earthy category.
When making this filled Armenian flatbread, mix the dough and let it rest while you finely chop the greens and herbs. By the time you’re done, the dough will be ready to portion. These are traditionally cooked on a domed cast-iron griddle called a saj, but a large flat griddle that covers two burners works just as well. If you have extra dough from making lavash, you can use it in place of the dough called for here for a slightly puffier version. If you run out of greens, roll out the extra dough here and griddle it as if it were lavash.
When there aren’t as many sour herbs available, the women who make jingalov hats in the Stepanakert bazaar cheat with a pinch of citric acid. Some home cooks even mix chopped fruit leathers made of sour plums to deliver that sour tang. Here, we’ve turned to lemon juice for a similar effect. For her signature sweet-tart finish, Harutyunyanl also adds a handful of pomegranate seeds.
Featured in: Demystifying the Breads of Armenia
Equipment
Ingredients
For the dough:
- 1 tsp. kosher salt
- 1 1⁄2 cups (210 g) all-purpose flour, plus more for dusting
- Sunflower oil or other neutral oil for greasing
For the filling:
- 8 cups total (440 g) of washed and well dried, finely sliced greens and herbs, made up of the following combination:
- 4 cups (220 g) beet greens, spinach, or collards (neutral flavor; use at least two)
- 2 cups (110 g) dill, cilantro, tarragon, or Italian parsley (herby flavor; use at least three)
- 2 cups (110 g) dandelion greens, sorrel, radish greens, or watercress (sour flavor; use at least two)
- 4 cups (220 g) beet greens, spinach, or collards (neutral flavor; use at least two)
- 2 cups (110 g) dill, cilantro, tarragon, or Italian parsley (herby flavor; use at least three)
- 2 cups (110 g) dandelion greens, sorrel, radish greens, or watercress (sour flavor; use at least two)
- 3 medium scallions (40 g), thinly sliced (½ cup)
- 2 tsp. sweet paprika
- 1 tsp. kosher salt
- 1⁄2 tsp. red pepper flakes
- 1 1⁄2 Tbsp. sunflower oil or other neutral oil
- 1 Tbsp. lemon juice
- Handful of pomegranate seeds (optional)
Instructions
Step 1
Step 2
Step 3
Step 4
Step 5
- Make the dough: In a large bowl, combine ⅔ cup lukewarm water and salt. Using your hands, gradually incorporate the flour, then knead it briefly in the bowl just until a shaggy dough forms. (It’s okay if it’s slightly sticky at this point.) Lightly flour a clean work surface then turn the dough out onto it and knead until it begins to become smooth and elastic, about 4 minutes. Lightly oil the inside of a large bowl, roll the dough into a ball, and transfer it to the bowl. Cover with a kitchen towel, and set the dough aside at room temperature for at least 20 minutes or up to an hour while you chop the herbs and greens. (It will soften and become smoother as it rests.)
- Return the dough to the floured surface and divide it into four equal pieces, about 3 ounces (85 grams) each. To shape the dough, cup the palm of your hand over one portion at a time and move your hand in a circle. The friction from the counter will help form the dough into a ball. If there is too much flour on the surface and the dough is sliding around, give the counter a spritz of water and try again. Cover the pieces with a dry kitchen towel or lightly oiled sheet of plastic wrap while you finish preparing the filling.
- Make the filling: To a large bowl, add all of the the greens and herbs, scallions, paprika, salt, red pepper flakes, oil, and lemon juice, and mix well with your hands to ensure everything is evenly seasoned.
- Shape the jingalov hats: Lightly dust the work surface and a rolling pin with the additional flour. Pat one of the balls of dough into a flat round. Roll the dough out into a thin circle about 8 inches (20 cm) in diameter, and place about 2 cups (110 g) of the filling in the center of the circle. Sprinkle with pomegranate seeds, if using. Pick up two sides of the circle and pinch them together over the center of the filling. Continue pinching the edges together from top to bottom so that the middle is wide and the ends form points. When you get to the end, tuck in the tip so it’s sealed but ensure that there is filling all the way to the tip. Firmly press the seam to ensure the dough is sealed. Turn seam-side down and flatten the dough with the palm of your hand so that it resembles a deflated football. It should be ¼–½ inch (6–12 mm) thick. (If thicker, roll with a rolling pin to flatten.)
- Cook the jingalov hats: Heat a 20-inch (50 cm) cast-iron griddle or pan over medium-high heat. Place one of the hats, seam-side down, in the center. Lower the heat to medium and cook until it is evenly browned, 2½–3 minutes. Flip and continue cooking on the opposite side, 2 minutes more. If the dough still seems a little pale or raw, adjust the heat to medium-high and continue cooking the flatbread, flipping it over now and again so it cooks evenly. While the first flatbread cooks, start rolling out and filling the dough for the second jingalov hat. Using a spatula, transfer the cooked flatbread to a large platter, cover with a dry towel and keep warm while you repeat the process with the remaining dough and filling. Serve warm or at room temperature. Alternatively, cool completely then freeze for up to 2 months. Jingalov hats can be reheated by popping them in a preheated 400° oven for about 10 minutes, until hot and crispy on the edges. Otherwise, extra jingalov hats keep for a day at room temperature or in the refrigerator for up to 3 days.
Keep Reading
Continue to Next Story

