Vegan Botanical Tamales with Hibiscus-Jackfruit “Carnitas”
Fresh and dried flowers lend a festive, springtime touch to LA’s beloved Mexican treat.
- Time
1 hour 50 minutes

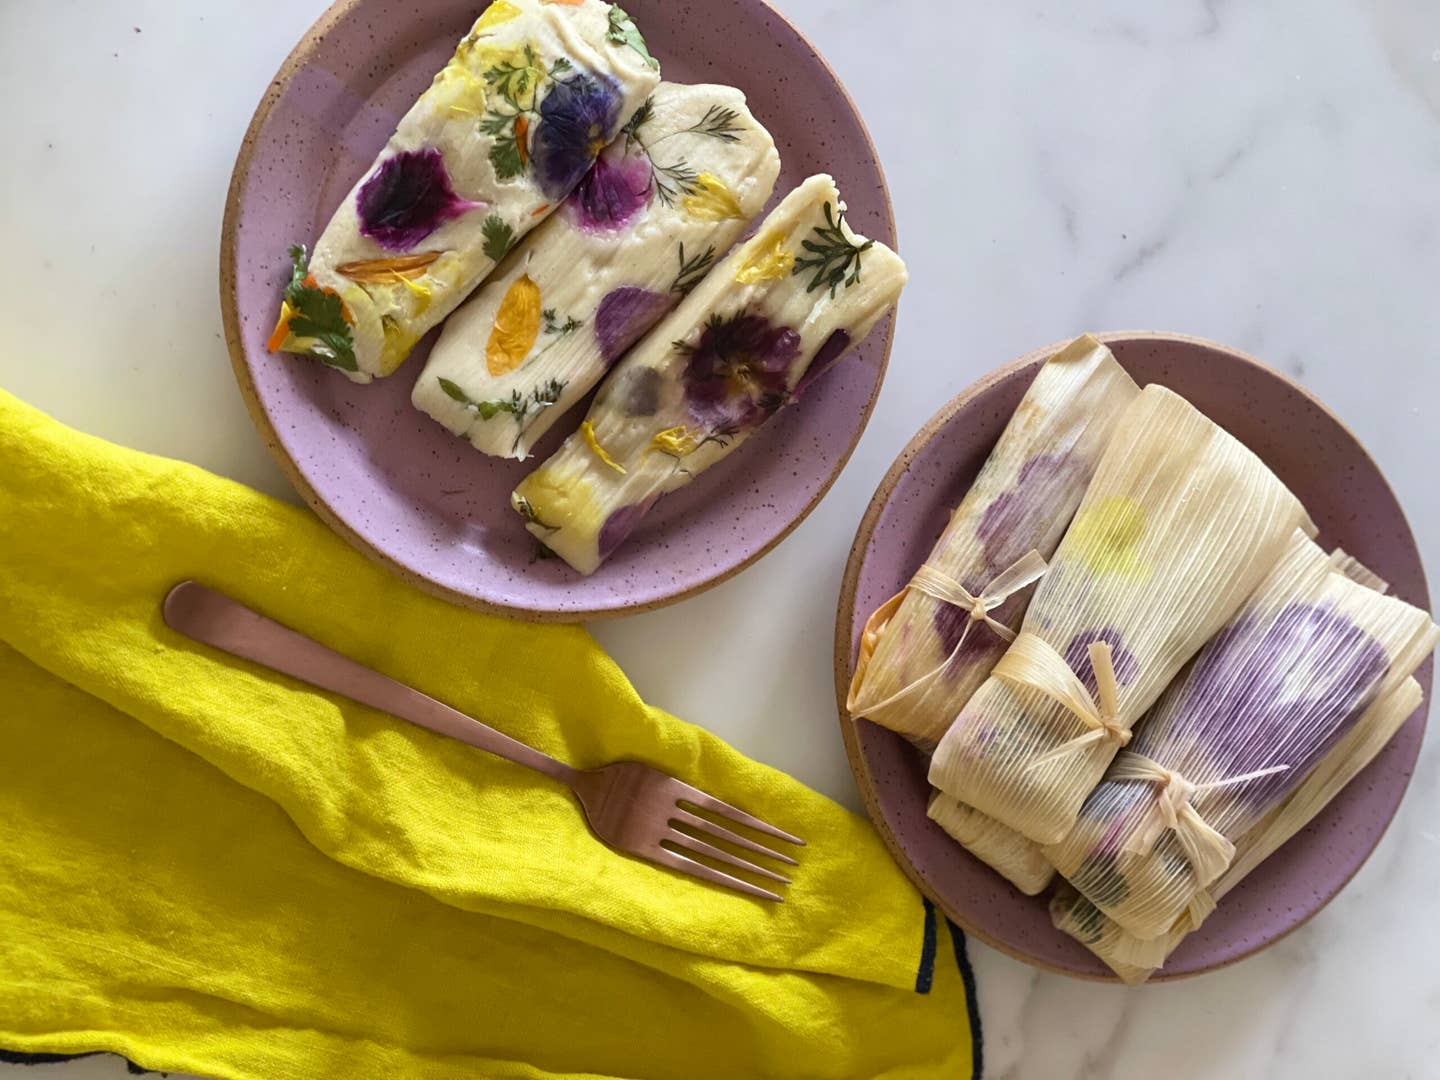
Combining both fresh and dried flowers in a single dish is a great way to get the best of both worlds—potency and visual appeal—as seen in Los Angeles baker Loria Stern’s eye-catching floral tamales. After enjoying a batch of locally made tamales with friends and family around the holidays, she decided to put her own botanical spin on the beloved Mexican dish. For a pretty, painted effect, Stern lines corn husks with fresh edible flowers; to make the dish suitable for vegans and vegetarians, she swaps out the traditional lard in the masa for olive oil and fills each tamal with a spicy, jackfruit filling.
The vibrant fresh flowers in these plant-based tamales retain their color even after cooking, freezing, and reheating, making this recipe especially well-suited to batching up and gifting around the spring holidays.
Read more about Stern's botanically-inspired recipes in "Loria Stern’s Floral Kitchen."
Ingredients
For the Hibiscus Jackfruit Filling:
- 2 tbsp. dried hibiscus flowers
- 1 tbsp. extra-virgin olive oil
- 1 medium yellow onion (8 oz.) thinly sliced
- 2 garlic cloves, finely minced
- 1 tsp. medium jalapeño (2 oz.), seeds and pith removed, finely chopped
- 1 tsp. 20-oz. can young jackfruit in brine, drained, and broken up into shreds
- 1⁄2 tsp. kosher salt
- 1 tsp. chili powder
- 1 tsp. ground cumin
- 1 tsp. dried Mexican oregano
- 1 smoked paprika
- Fresh lime juice
- Cayenne pepper or ground chipotle chile (optional)
For the tamales:
- 18 corn husks
- 3 1⁄2 cups masa harina
- 1 tbsp. kosher salt
- 1 tsp. baking powder
- 3 cups vegetable stock
- 1⁄4 cup extra-virgin olive oil
- 1 cup assorted edible flowers, washed and patted dry (including brightly colored pansies, violas, sunflower petals, nasturtium blooms, and marigolds), mixed with soft, fresh herbs (such as cilantro, parsley, chervil, or tarragon)
- Salsa or hot sauce, for serving (optional)
Instructions
Step 1
Step 2
Step 3
Step 4
Step 5
- To a heatproof liquid measuring cup, add ¾ cups boiling water and the dried hibiscus flowers. To a large bowl, add the corn husks and enough hot water to completely submerge. Set aside both aside until the husks are softened and pliable, about 30 minutes.
- Strain the hibiscus infusion, discarding the solids. Measure ½ cup of the liquid (drink or reserve any remainder for another use). To a large skillet over medium heat, add the oil; when the oil is hot, add the onion, garlic, and jalapeño and cook, stirring frequently, until the onion is translucent, about 4 minutes. Stir in the chili powder, cumin, oregano, paprika, and salt, then stir in the jackfruit to coat with the spices. Add the reserved hibiscus tea, bring to a boil, then lower the heat to simmer and cook, stirring occasionally, until most of the liquid has evaporated, about 5 minutes. Season to taste with additional salt and fresh lime juice, then adjust the spice level with cayenne or chipotle, if desired. Set aside until cool enough to handle.
- Assemble the tamales: To a large bowl, add the masa harina, baking powder, and salt. Stir to combine, then make a well in the center and add the stock and olive oil. Using your hand, mix until dough forms into a ball. Cover with a kitchen towel to keep the dough from drying out.
- Drain the corn husks and blot them dry with a clean kitchen towel. Lay one husk on a clean work surface with the curved side facing up and the pointed end positioned away from you. Arrange a few edible flowers face-down over the husk, then add a few sprigs of fresh herbs. Scoop ¼ cup of the masa onto the husk and then, using your hands, gently press and spread it into an even layer, about ¼ inch thick. (Trying not to disrupt the placement of the flowers and herbs.) Place a generous tablespoon of the reserved hibiscus-jackfruit filling in a line down the center of the masa. Fold the long sides of the husk over the filling to enclose, then fold the narrow end of the husk down. Tear one of the corn husks into thin strips and use one of the strips to tie the tamal, securing the three folded sides. (One end of the tamal will remain open). Repeat with the remaining masa and filling.
- To a deep pot fitted with a steamer basket, add enough cold water to reach just below the bottom of the steamer. Arrange the tamales in the steamer so that they are standing upright, with their open ends pointed up. Bring a boil over high heat, then turn the heat to medium-low, cover, and cook until the tamales hold their shape and pull cleanly away from their wrappers when tested, 20–30 minutes. Serve hot, with salsa or hot sauce on the side, if desired. Store any leftovers in an airtight container in the fridge for up to 7 days, or in the freezer for up to 3 months.
Keep Reading
Continue to Next Story


