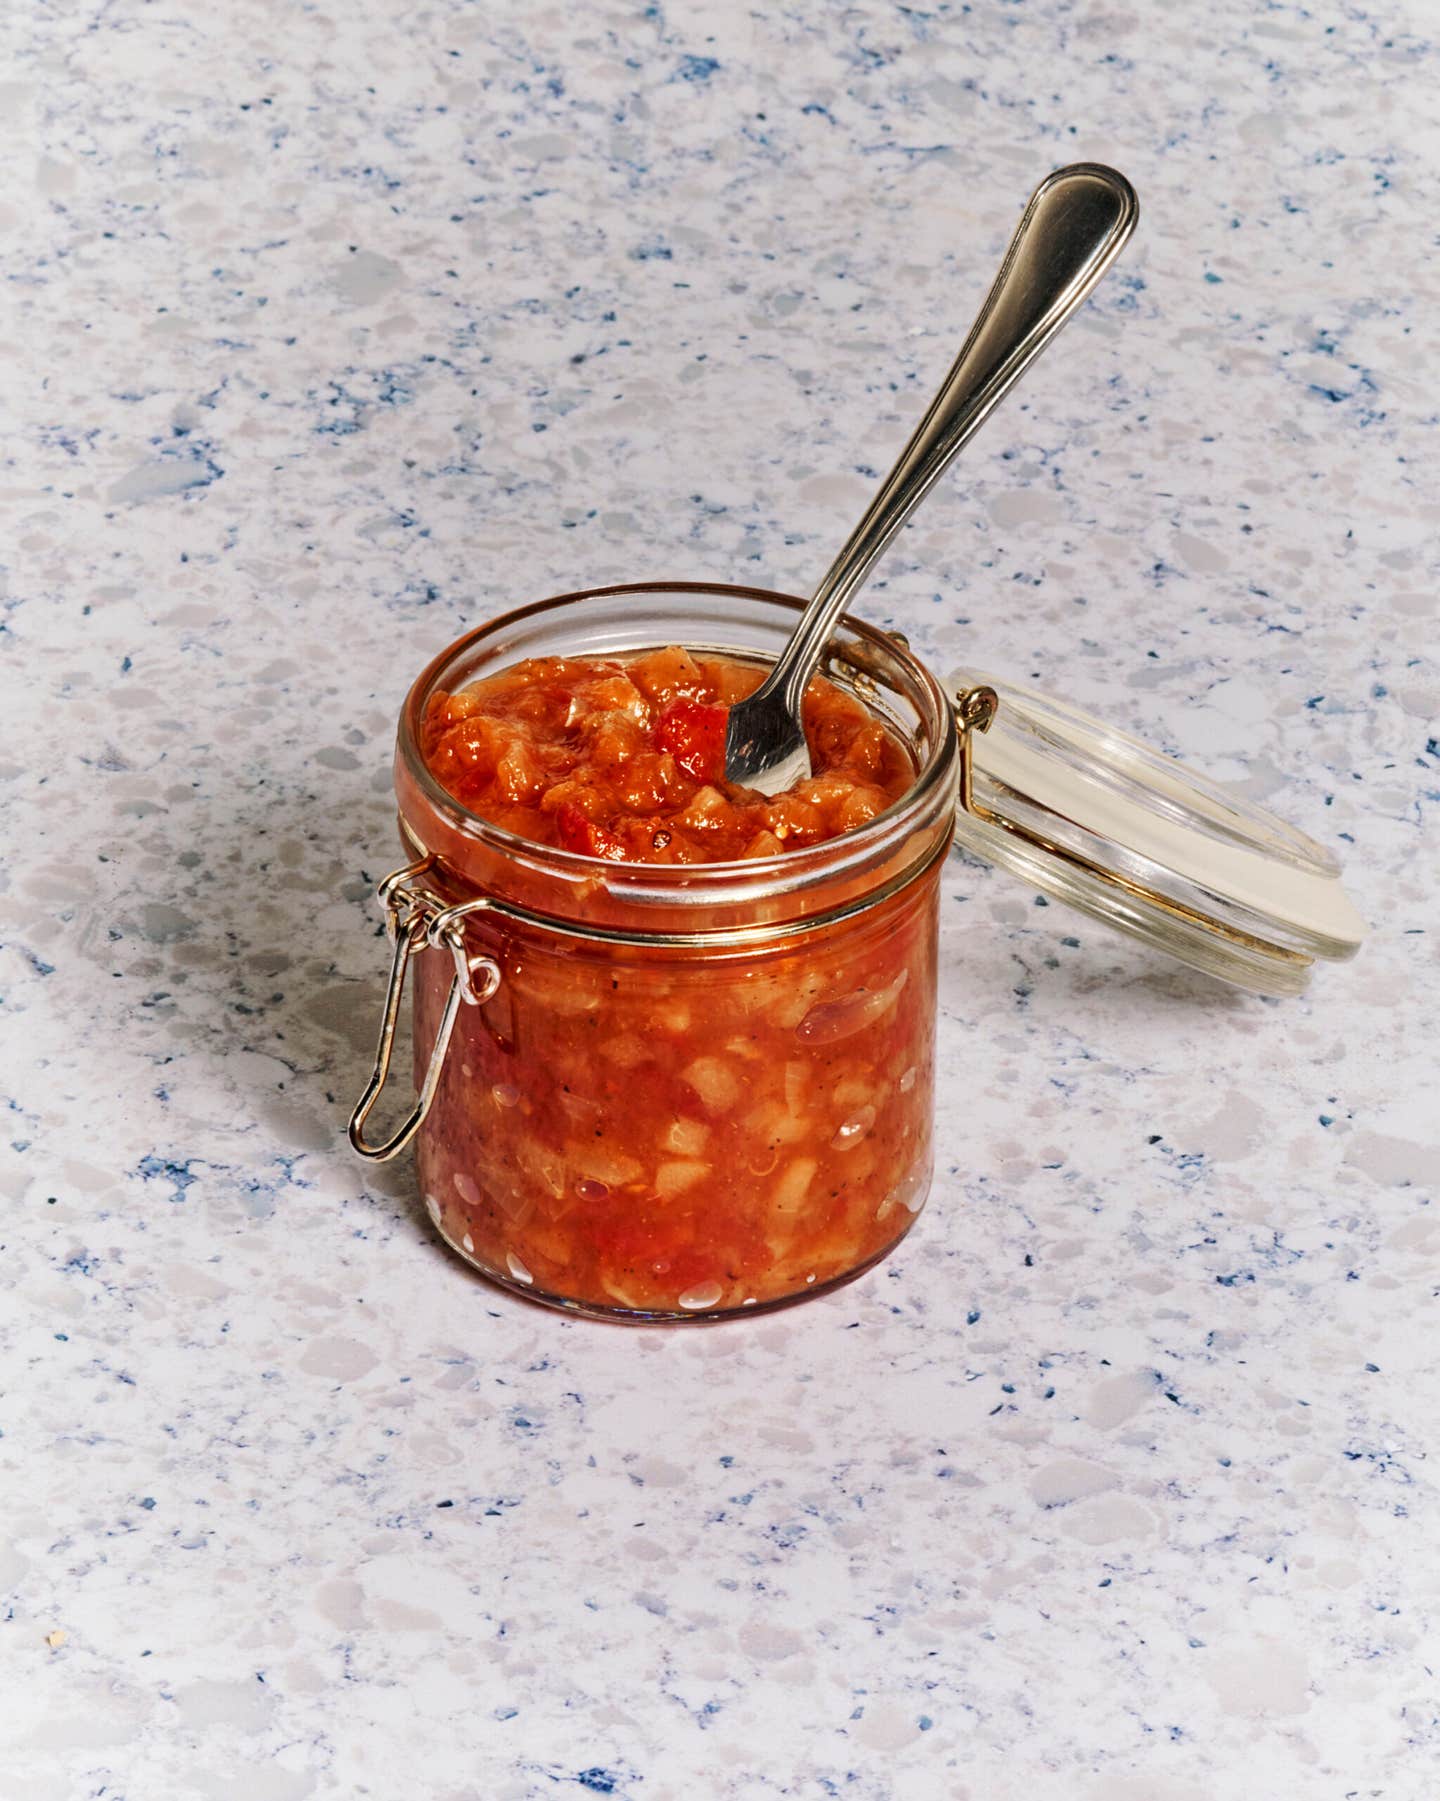
Sherried Apple ChutneyFall fruit and nutty fortified wine meet in this tart and giftable condiment.

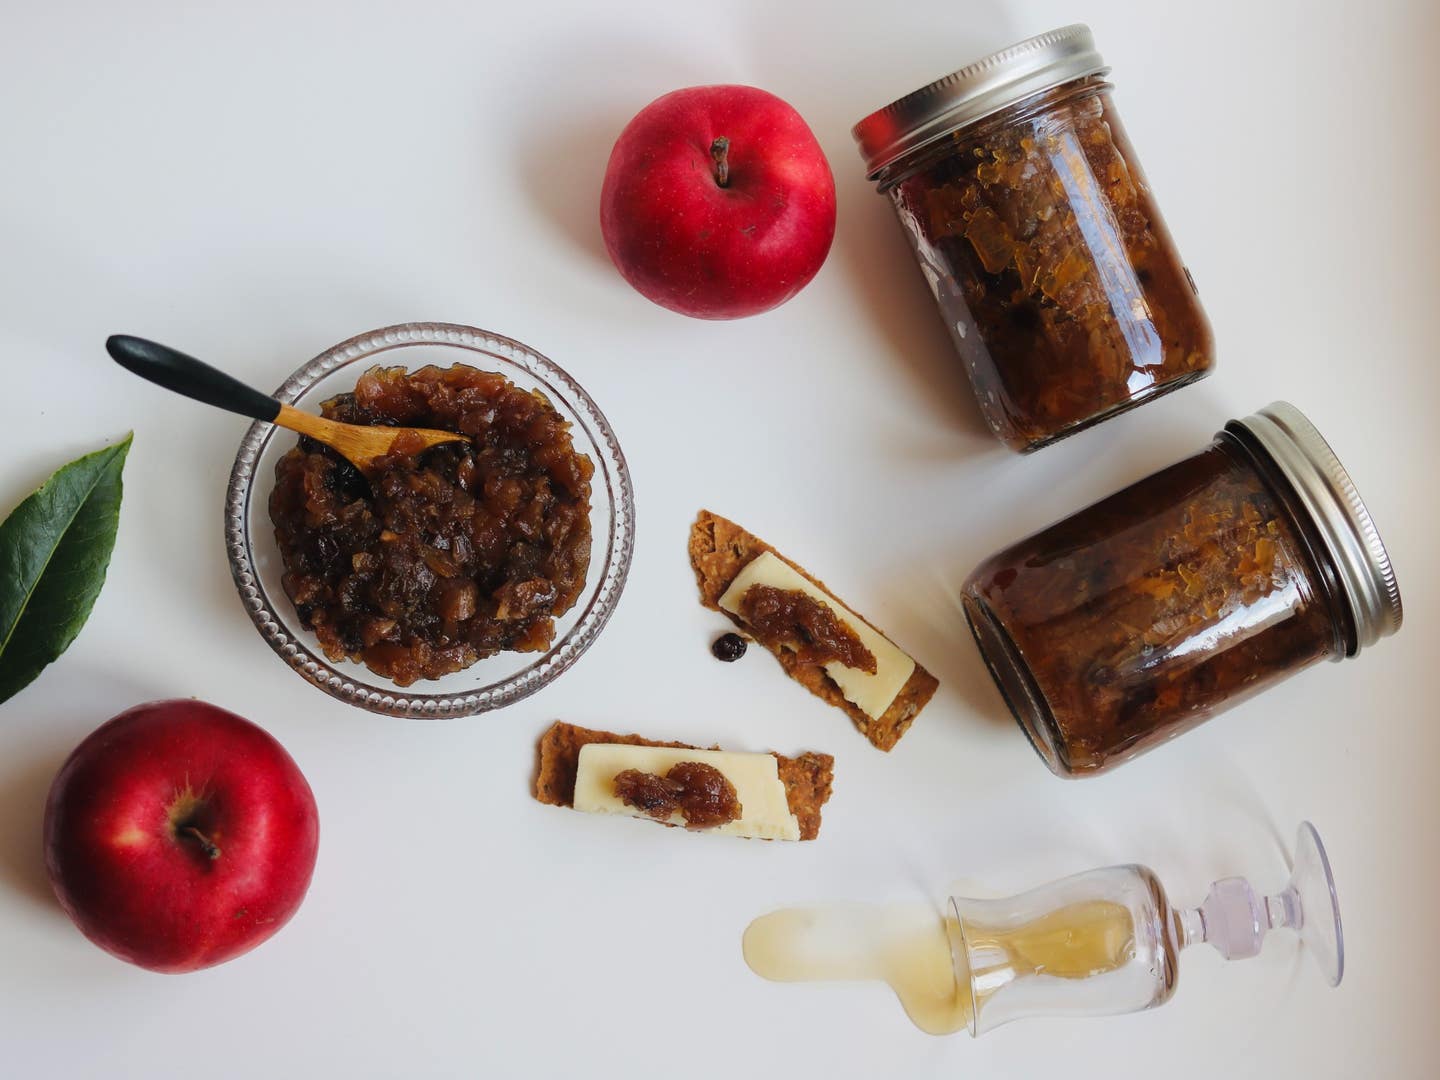
The most difficult thing about this flavorful sherried apple chutney recipe from master preserver Camilla Wynne is the time you must wait between making and enjoying it. For best results, hold off for at least a month before opening in order to give all the flavors time to really get to know each other. And while it’s delicious with roast meats and on sandwiches, it truly shines paired with Spanish cheeses like manchego, idiazábal, and cabrales. Serve with more sherry and a candlelit reading of Poe’s “The Cask of Amontillado.”

Select an amontillado or dry oloroso sherry, either of which will lend a nutty, complex quality without stealing the show the way a sweeter wine might.

  • Serves

    makes Six 8-oz. jars

  • Time

    1 hour 50 minutes

Ingredients

  • 2 lb. baking apples, such as Cortlands
  • 1 lb. shallots, peeled
  • 2 cups (15½ oz.) dark brown sugar
  • 1½ cups apple cider vinegar
  • 1 cup sherry vinegar
  • ½ cups amontillado or dry oloroso sherry
  • ⅔ cups dried currants
  • ⅓ cups golden raisins
  • 3 tbsp. thinly sliced sage leaves
  • 4 medium garlic cloves, finely chopped
  • 3 fresh bay leaves
  • 1 tbsp. plus 1½ tsp. kosher salt
  • 1½ tsp. freshly ground black pepper

Instructions

Step 1

Make the chutney: Quarter and core the apples, then, working in two batches, transfer to a bowl of a food processor along with the shallots and pulse until finely chopped. Transfer to a large, heavy bottomed, non-reactive pot, then add ther brown sugar, vinegars, sherry, currants, raisins, sage, garlic, bay leaves, salt, and pepper. Bring to a boil over high heat, then lower to the heat to medium and cook, stirring occasionally and regulating the heat to maintain a simmer, until the chutney is thick and jammy, 50–70 minutes.

Step 2

Place a silicone mat or a tea towel at the bottom of a large pot, fill ¾ of the way with water, and bring to a rolling boil. Turn off heat and cover with a lid to keep the water hot.

Step 3

Wash six 8-ounce mason jars. Make sure the ring bands and unused snap lids are close at hand. Once the chutney is ready, remove from heat. Remove and discard the bay leaves, then, working over the sheet pan and using a funnel or ladle, fill the jars to within ½ inch of the rim. Tap gently or use an air bubble remover, then wipe the rims clean of any drips or splatters. Place the snap lids on the jars and screw the ring bands on just until you feel resistance (do not firmly tighten).

Step 4

Using a jar lifter or a sturdy pair of tongs, carefully place the jars in the pot of hot water, making sure they are covered with at least 1 inch of water, then cover the pot with its lid. Return to high heat, bring the water back up to a full boil, then lower the heat to cook at a gentle boil, and set a timer for 10 minutes. Turn off the heat, remove the lid, and let the jars sit in the hot water for 5 minutes more. Using the jar lifter, transfer the jars to a towel, cutting board, or wire rack and set aside at room temperature without disturbing for 24 hours. If canned properly, the chutney will form a vacuum, either in the pot or as it cools, sealing the jars closed. Check the seals before storing (any unsealed jars can be stored in the fridge for at least 2 months. Label and store sealed jars in a cool, dark, and dry place for at least 1 month before serving. Properly canned chutney will keep well for at least one year.
  1. Make the chutney: Quarter and core the apples, then, working in two batches, transfer to a bowl of a food processor along with the shallots and pulse until finely chopped. Transfer to a large, heavy bottomed, non-reactive pot, then add ther brown sugar, vinegars, sherry, currants, raisins, sage, garlic, bay leaves, salt, and pepper. Bring to a boil over high heat, then lower to the heat to medium and cook, stirring occasionally and regulating the heat to maintain a simmer, until the chutney is thick and jammy, 50–70 minutes.
  2. Place a silicone mat or a tea towel at the bottom of a large pot, fill ¾ of the way with water, and bring to a rolling boil. Turn off heat and cover with a lid to keep the water hot.
  3. Wash six 8-ounce mason jars. Make sure the ring bands and unused snap lids are close at hand. Once the chutney is ready, remove from heat. Remove and discard the bay leaves, then, working over the sheet pan and using a funnel or ladle, fill the jars to within ½ inch of the rim. Tap gently or use an air bubble remover, then wipe the rims clean of any drips or splatters. Place the snap lids on the jars and screw the ring bands on just until you feel resistance (do not firmly tighten).
  4. Using a jar lifter or a sturdy pair of tongs, carefully place the jars in the pot of hot water, making sure they are covered with at least 1 inch of water, then cover the pot with its lid. Return to high heat, bring the water back up to a full boil, then lower the heat to cook at a gentle boil, and set a timer for 10 minutes. Turn off the heat, remove the lid, and let the jars sit in the hot water for 5 minutes more. Using the jar lifter, transfer the jars to a towel, cutting board, or wire rack and set aside at room temperature without disturbing for 24 hours. If canned properly, the chutney will form a vacuum, either in the pot or as it cools, sealing the jars closed. Check the seals before storing (any unsealed jars can be stored in the fridge for at least 2 months. Label and store sealed jars in a cool, dark, and dry place for at least 1 month before serving. Properly canned chutney will keep well for at least one year.
Recipes

Sherried Apple Chutney

Fall fruit and nutty fortified wine meet in this tart and giftable condiment.

  • Serves

    makes Six 8-oz. jars

  • Time

    1 hour 50 minutes

Sherried Apple Chutney Recipe Canned and Jarred
PHOTOGRAPHY BY CAMILLA WYNNE

By Camilla Wynne


Updated on September 16, 2021

The most difficult thing about this flavorful sherried apple chutney recipe from master preserver Camilla Wynne is the time you must wait between making and enjoying it. For best results, hold off for at least a month before opening in order to give all the flavors time to really get to know each other. And while it’s delicious with roast meats and on sandwiches, it truly shines paired with Spanish cheeses like manchego, idiazábal, and cabrales. Serve with more sherry and a candlelit reading of Poe’s “The Cask of Amontillado.”

Select an amontillado or dry oloroso sherry, either of which will lend a nutty, complex quality without stealing the show the way a sweeter wine might.

Ingredients

  • 2 lb. baking apples, such as Cortlands
  • 1 lb. shallots, peeled
  • 2 cups (15½ oz.) dark brown sugar
  • 1½ cups apple cider vinegar
  • 1 cup sherry vinegar
  • ½ cups amontillado or dry oloroso sherry
  • ⅔ cups dried currants
  • ⅓ cups golden raisins
  • 3 tbsp. thinly sliced sage leaves
  • 4 medium garlic cloves, finely chopped
  • 3 fresh bay leaves
  • 1 tbsp. plus 1½ tsp. kosher salt
  • 1½ tsp. freshly ground black pepper

Instructions

Step 1

Make the chutney: Quarter and core the apples, then, working in two batches, transfer to a bowl of a food processor along with the shallots and pulse until finely chopped. Transfer to a large, heavy bottomed, non-reactive pot, then add ther brown sugar, vinegars, sherry, currants, raisins, sage, garlic, bay leaves, salt, and pepper. Bring to a boil over high heat, then lower to the heat to medium and cook, stirring occasionally and regulating the heat to maintain a simmer, until the chutney is thick and jammy, 50–70 minutes.

Step 2

Place a silicone mat or a tea towel at the bottom of a large pot, fill ¾ of the way with water, and bring to a rolling boil. Turn off heat and cover with a lid to keep the water hot.

Step 3

Wash six 8-ounce mason jars. Make sure the ring bands and unused snap lids are close at hand. Once the chutney is ready, remove from heat. Remove and discard the bay leaves, then, working over the sheet pan and using a funnel or ladle, fill the jars to within ½ inch of the rim. Tap gently or use an air bubble remover, then wipe the rims clean of any drips or splatters. Place the snap lids on the jars and screw the ring bands on just until you feel resistance (do not firmly tighten).

Step 4

Using a jar lifter or a sturdy pair of tongs, carefully place the jars in the pot of hot water, making sure they are covered with at least 1 inch of water, then cover the pot with its lid. Return to high heat, bring the water back up to a full boil, then lower the heat to cook at a gentle boil, and set a timer for 10 minutes. Turn off the heat, remove the lid, and let the jars sit in the hot water for 5 minutes more. Using the jar lifter, transfer the jars to a towel, cutting board, or wire rack and set aside at room temperature without disturbing for 24 hours. If canned properly, the chutney will form a vacuum, either in the pot or as it cools, sealing the jars closed. Check the seals before storing (any unsealed jars can be stored in the fridge for at least 2 months. Label and store sealed jars in a cool, dark, and dry place for at least 1 month before serving. Properly canned chutney will keep well for at least one year.
  1. Make the chutney: Quarter and core the apples, then, working in two batches, transfer to a bowl of a food processor along with the shallots and pulse until finely chopped. Transfer to a large, heavy bottomed, non-reactive pot, then add ther brown sugar, vinegars, sherry, currants, raisins, sage, garlic, bay leaves, salt, and pepper. Bring to a boil over high heat, then lower to the heat to medium and cook, stirring occasionally and regulating the heat to maintain a simmer, until the chutney is thick and jammy, 50–70 minutes.
  2. Place a silicone mat or a tea towel at the bottom of a large pot, fill ¾ of the way with water, and bring to a rolling boil. Turn off heat and cover with a lid to keep the water hot.
  3. Wash six 8-ounce mason jars. Make sure the ring bands and unused snap lids are close at hand. Once the chutney is ready, remove from heat. Remove and discard the bay leaves, then, working over the sheet pan and using a funnel or ladle, fill the jars to within ½ inch of the rim. Tap gently or use an air bubble remover, then wipe the rims clean of any drips or splatters. Place the snap lids on the jars and screw the ring bands on just until you feel resistance (do not firmly tighten).
  4. Using a jar lifter or a sturdy pair of tongs, carefully place the jars in the pot of hot water, making sure they are covered with at least 1 inch of water, then cover the pot with its lid. Return to high heat, bring the water back up to a full boil, then lower the heat to cook at a gentle boil, and set a timer for 10 minutes. Turn off the heat, remove the lid, and let the jars sit in the hot water for 5 minutes more. Using the jar lifter, transfer the jars to a towel, cutting board, or wire rack and set aside at room temperature without disturbing for 24 hours. If canned properly, the chutney will form a vacuum, either in the pot or as it cools, sealing the jars closed. Check the seals before storing (any unsealed jars can be stored in the fridge for at least 2 months. Label and store sealed jars in a cool, dark, and dry place for at least 1 month before serving. Properly canned chutney will keep well for at least one year.

Continue to Next Story

Want more SAVEUR?

Get our favorite recipes, stories, and more delivered to your inbox.