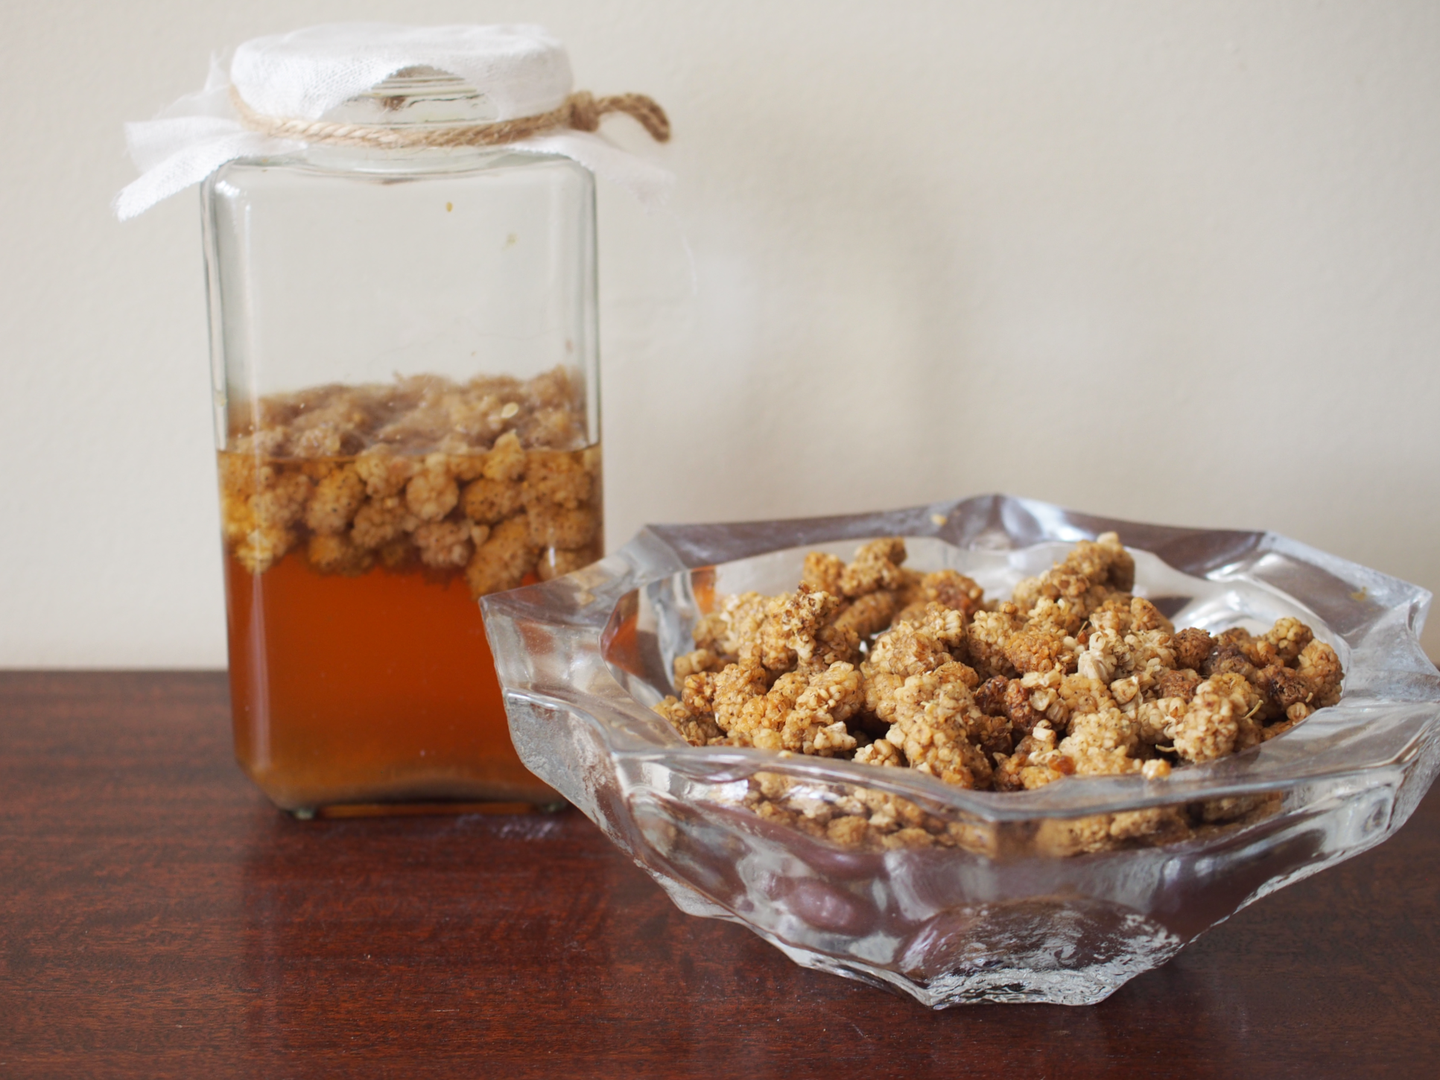
Dried Mulberry Fruit Vinegar
Your guide to fermenting any berry.

By Nissan Haque


Updated on October 13, 2021

Vinegar is a relationship between sugar, water, and time. The world is full of wonderful microbes that require just a nudge to begin fermenting a fine batch of your own sour brew. Begin with purified bottled water that is free of chlorine and fluorides. Most tap water is treated to sterilize it, but that also means it can harm the beneficial cultures that you want to thrive. 

Taiwanese-style fruit vinegars can be made with a range of different ingredients, though there is often an emphasis on particularly acidic fruits like pineapples and citrus, which, over time, help to develop a prized tangerine-rind flavor known as chenpi. Feel free to use your own favorite fruit for your batch. While both fresh and dried fruit may be used, dried ingredients are generally a bit more stable, and less prone to spoilage and infections during the fermentation process.

Writer Nissan Haque’s vinegar guru, Kathy Yongxue Mei, suggests using manuka honey, which is believed to have natural antibacterial properties, to jumpstart the fermentation, but feel free to substitute ordinary sugar if you prefer a cleaner taste. Live organic apple cider vinegar is now widely available on grocery shelves. These typically contain their own vinegar “mother,” which can be used in small amounts to provide the microbial framework to seed your own brew. This ingredient isn’t strictly necessary, but if you find that even after three weeks a mother has not formed, adding a tablespoon from the bottle can help the process along. 

Straining your vinegar is also not necessary but doing so prevents “off” flavors from forming as the dead yeasts settle. Use a pH kit to periodically taste the liquid as it ferments. A vinegar with at least four percent acidity or a relative pH between 2.5–4 will be shelf-stable enough to age well into the future. 

Equipment you will need:

  • Serves

    makes 500ml

  • Time

    2 hours

Ingredients

  • 4 oz. (115 g) dried mulberries
  • 1 tbsp. manuka honey or sugar
  • 2 cups plus 2 Tbsp. (500 mL) purified water
  • 1 tbsp. live organic apple cider vinegar with its mother

Instructions

Step 1

Sterilize two 32-ounce glass jars either in boiling water or using the high setting in your dishwasher. To one of the sterilized jars, add the mulberries and honey or sugar, then cover with the purified water, leaving 1 inch of space from the rim. Stir gently, then partially cover with a lid, leaving a slight space to allow gas to escape. Set aside, undisturbed, at room temperature (60-80° F) until the mixture begins to ferment and bubbles begin to form, 5–10 days.

Step 2

When the bubbles begin to slow, the alcoholic fermentation is complete; open the jar, strain its contents into the second sterilized jar. Stir in the apple cider vinegar to jumpstart the second fermentation, then place a few layers of cheesecloth over the top of the jar and secure with twine or a rubber band. Set aside, again at room temperature. After a week, begin checking the pH with test strips every few days. A “mother” should begin to form along the surface of the liquid and the liquid will begin to smell sour and rosy. When the pH reaches 2.5, the vinegar is ready to be bottled. Discard the cheesecloth and strain the mixture into a jar with a plastic lid. (If a mother has formed, you may use sterile chopsticks to gently remove it for use in your next batch of vinegar).

Step 3

Seal the jar with a tight-fitting plastic lid. Store in a cool, dark place for at least six months, or for several years. After six months, the vinegar is ready for vinaigrettes, sauces, and anywhere you would use a culinary white vinegar. After five years, your brew is ready to be sipped straight, over ice, diluted in water, or in a rich shrub.
  1. Sterilize two 32-ounce glass jars either in boiling water or using the high setting in your dishwasher. To one of the sterilized jars, add the mulberries and honey or sugar, then cover with the purified water, leaving 1 inch of space from the rim. Stir gently, then partially cover with a lid, leaving a slight space to allow gas to escape. Set aside, undisturbed, at room temperature (60-80° F) until the mixture begins to ferment and bubbles begin to form, 5–10 days.
  2. When the bubbles begin to slow, the alcoholic fermentation is complete; open the jar, strain its contents into the second sterilized jar. Stir in the apple cider vinegar to jumpstart the second fermentation, then place a few layers of cheesecloth over the top of the jar and secure with twine or a rubber band. Set aside, again at room temperature. After a week, begin checking the pH with test strips every few days. A “mother” should begin to form along the surface of the liquid and the liquid will begin to smell sour and rosy. When the pH reaches 2.5, the vinegar is ready to be bottled. Discard the cheesecloth and strain the mixture into a jar with a plastic lid. (If a mother has formed, you may use sterile chopsticks to gently remove it for use in your next batch of vinegar).
  3. Seal the jar with a tight-fitting plastic lid. Store in a cool, dark place for at least six months, or for several years. After six months, the vinegar is ready for vinaigrettes, sauces, and anywhere you would use a culinary white vinegar. After five years, your brew is ready to be sipped straight, over ice, diluted in water, or in a rich shrub.
Recipes

Dried Mulberry Fruit Vinegar

Your guide to fermenting any berry.

  • Serves

    makes 500ml

  • Time

    2 hours

Aged Mulberry Vinegar
NISSAN HAQUE

By Nissan Haque


Updated on October 13, 2021

Vinegar is a relationship between sugar, water, and time. The world is full of wonderful microbes that require just a nudge to begin fermenting a fine batch of your own sour brew. Begin with purified bottled water that is free of chlorine and fluorides. Most tap water is treated to sterilize it, but that also means it can harm the beneficial cultures that you want to thrive. 

Taiwanese-style fruit vinegars can be made with a range of different ingredients, though there is often an emphasis on particularly acidic fruits like pineapples and citrus, which, over time, help to develop a prized tangerine-rind flavor known as chenpi. Feel free to use your own favorite fruit for your batch. While both fresh and dried fruit may be used, dried ingredients are generally a bit more stable, and less prone to spoilage and infections during the fermentation process.

Writer Nissan Haque’s vinegar guru, Kathy Yongxue Mei, suggests using manuka honey, which is believed to have natural antibacterial properties, to jumpstart the fermentation, but feel free to substitute ordinary sugar if you prefer a cleaner taste. Live organic apple cider vinegar is now widely available on grocery shelves. These typically contain their own vinegar “mother,” which can be used in small amounts to provide the microbial framework to seed your own brew. This ingredient isn’t strictly necessary, but if you find that even after three weeks a mother has not formed, adding a tablespoon from the bottle can help the process along. 

Straining your vinegar is also not necessary but doing so prevents “off” flavors from forming as the dead yeasts settle. Use a pH kit to periodically taste the liquid as it ferments. A vinegar with at least four percent acidity or a relative pH between 2.5–4 will be shelf-stable enough to age well into the future. 

Equipment you will need:

Ingredients

  • 4 oz. (115 g) dried mulberries
  • 1 tbsp. manuka honey or sugar
  • 2 cups plus 2 Tbsp. (500 mL) purified water
  • 1 tbsp. live organic apple cider vinegar with its mother

Instructions

Step 1

Sterilize two 32-ounce glass jars either in boiling water or using the high setting in your dishwasher. To one of the sterilized jars, add the mulberries and honey or sugar, then cover with the purified water, leaving 1 inch of space from the rim. Stir gently, then partially cover with a lid, leaving a slight space to allow gas to escape. Set aside, undisturbed, at room temperature (60-80° F) until the mixture begins to ferment and bubbles begin to form, 5–10 days.

Step 2

When the bubbles begin to slow, the alcoholic fermentation is complete; open the jar, strain its contents into the second sterilized jar. Stir in the apple cider vinegar to jumpstart the second fermentation, then place a few layers of cheesecloth over the top of the jar and secure with twine or a rubber band. Set aside, again at room temperature. After a week, begin checking the pH with test strips every few days. A “mother” should begin to form along the surface of the liquid and the liquid will begin to smell sour and rosy. When the pH reaches 2.5, the vinegar is ready to be bottled. Discard the cheesecloth and strain the mixture into a jar with a plastic lid. (If a mother has formed, you may use sterile chopsticks to gently remove it for use in your next batch of vinegar).

Step 3

Seal the jar with a tight-fitting plastic lid. Store in a cool, dark place for at least six months, or for several years. After six months, the vinegar is ready for vinaigrettes, sauces, and anywhere you would use a culinary white vinegar. After five years, your brew is ready to be sipped straight, over ice, diluted in water, or in a rich shrub.
  1. Sterilize two 32-ounce glass jars either in boiling water or using the high setting in your dishwasher. To one of the sterilized jars, add the mulberries and honey or sugar, then cover with the purified water, leaving 1 inch of space from the rim. Stir gently, then partially cover with a lid, leaving a slight space to allow gas to escape. Set aside, undisturbed, at room temperature (60-80° F) until the mixture begins to ferment and bubbles begin to form, 5–10 days.
  2. When the bubbles begin to slow, the alcoholic fermentation is complete; open the jar, strain its contents into the second sterilized jar. Stir in the apple cider vinegar to jumpstart the second fermentation, then place a few layers of cheesecloth over the top of the jar and secure with twine or a rubber band. Set aside, again at room temperature. After a week, begin checking the pH with test strips every few days. A “mother” should begin to form along the surface of the liquid and the liquid will begin to smell sour and rosy. When the pH reaches 2.5, the vinegar is ready to be bottled. Discard the cheesecloth and strain the mixture into a jar with a plastic lid. (If a mother has formed, you may use sterile chopsticks to gently remove it for use in your next batch of vinegar).
  3. Seal the jar with a tight-fitting plastic lid. Store in a cool, dark place for at least six months, or for several years. After six months, the vinegar is ready for vinaigrettes, sauces, and anywhere you would use a culinary white vinegar. After five years, your brew is ready to be sipped straight, over ice, diluted in water, or in a rich shrub.

Continue to Next Story

Want more SAVEUR?

Get our favorite recipes, stories, and more delivered to your inbox.