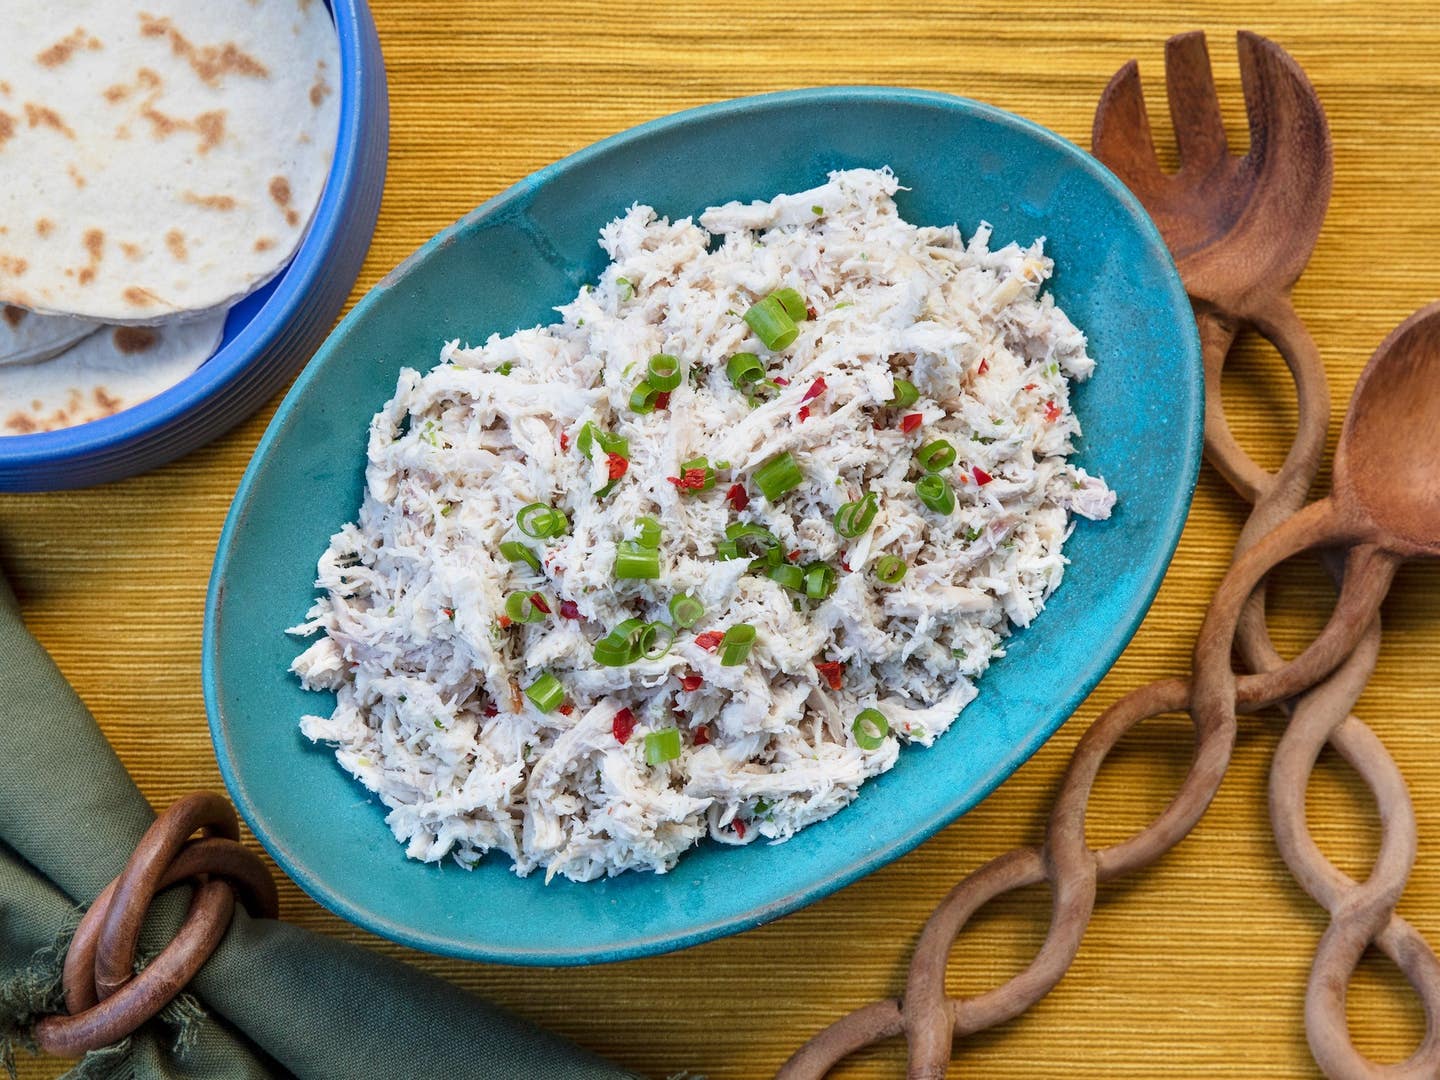
A classic CHamoru staple that’s popular on Guam, chicken kelaguen (in CHamoru, kelaguen månnok) is a dish whose appeal lies in its expert balance of familiar flavors: tangy citrus, fiery red chiles, and the creamy comfort of grated coconut. While unseasoned, grilled chicken is used as the base of this recipe from writer Larkin Fegurgur Clark, consider it an entry point for experimentation—kelaguen can also be made with other proteins, including fish, beef, venison, and even Spam. In this recipe, you may substitute the meat from a whole rotisserie chicken for freshly-grilled, keeping in mind that you may need to adjust the amount of lemon juice and coconut to balance the moisture level; you’ll also lose the smokiness that lends the traditional grilled version it’s complexity.
On Guam, chicken for kelaguen is grilled about 80 percent of the way, then citrus juice or lemon powder is added to finish “cooking” the meat to completion, much like fish proteins are denatured in Latin American ceviche. In the interest of food safety, Clark suggests grilling the chicken until it is fully cooked through. And finally, kelaguen is a dish that Guamanians like to get creative with, sometimes adding minced onions or bell peppers; feel free to taste-test and experiment as you go along to make this dish your own. It can be eaten on its own, or alongside warm white rice or titiyas (CHamorru lightly sweetened flour-and-coconut-milk tortillas). While the dish may be served immediately after assembling, its flavors will improve after a few hours or even a day or two in the fridge.
Ingredients
- One 4½-lb. chicken, cut into 6 pieces, skin removed
- 2 tbsp. extra-virgin olive oil (optional)
- 1 cup fresh lemon juice
- ½ cups finely chopped scallions, plus 1 Tbsp. thinly sliced, for garnish
- 4 small red bird’s eye chiles, seeded and minced (1 Tbsp.)
- 1½–2 cups (6¾–9 oz.) freshly grated or frozen, thawed coconut or substitute dried, grated, unsweetened coconut, plus more to taste
- 1 tsp. kosher salt
- White rice or CHamorru titiyas, for serving (optional)
Instructions
Step 1
Step 2
Step 3
Step 4
- Prepare a charcoal grill to cook over medium-high heat.
- Rub the chicken pieces all over with the olive oil then transfer to the grill and cook, turning occasionally, until lightly charred all over and cooked through, about 25 minutes. Transfer to a clean, heatproof dish and set aside to cool slightly.
- When the chicken is cool enough to handle, finely shred the meat (you should have about 5 cups); discard the bones. Transfer the chicken to a non-reactive bowl, then stir in the lemon juice, scallions, and chiles to combine. Fold in 1½ cups grated coconut to combine. The chicken should remain moist and fluffy, neither drowned in marinade nor overladen with coconut. If necessary, add more coconut, ¼ at a time and up to 2 cups, to achieve the proper consistency. Season to taste with salt, then transfer to a large serving dish, cover, and refrigerate for at least 1 and up to 24 hours.
- Garnish the kelaguen with thinly sliced scallions and serve at room temperature with hot white rice or with warm Chamorro titiyas, if desired. Store leftovers for up to 3 days.

Keep Reading
Continue to Next Story


