A Seaside Supper

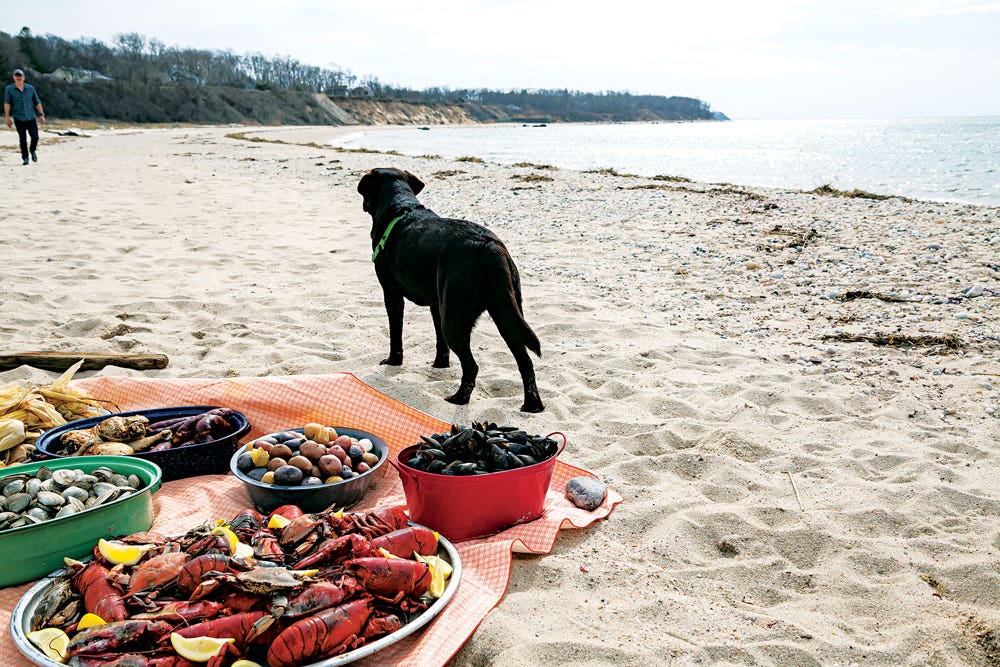
When I was eight years old, one of my dad's pals invited us to a clambake near our home on the Jersey shore. There was a certain drama to the whole thing. Digging the pit, gathering rocks to line it, layering on clams, lobsters—even hot dogs—and covering it with seaweed and a wet tarp. An hour later, when that tarp was lifted, the steam rose ten feet high, releasing an explosion of seafood aromas. It was stunning. What I learned that day is this: No cookout on the planet comes close to a clambake. Here's how to pull one off. —Jasper White

clambake, tools, kitchen, techniques, how-to, seafood, beach, summer
Step 1

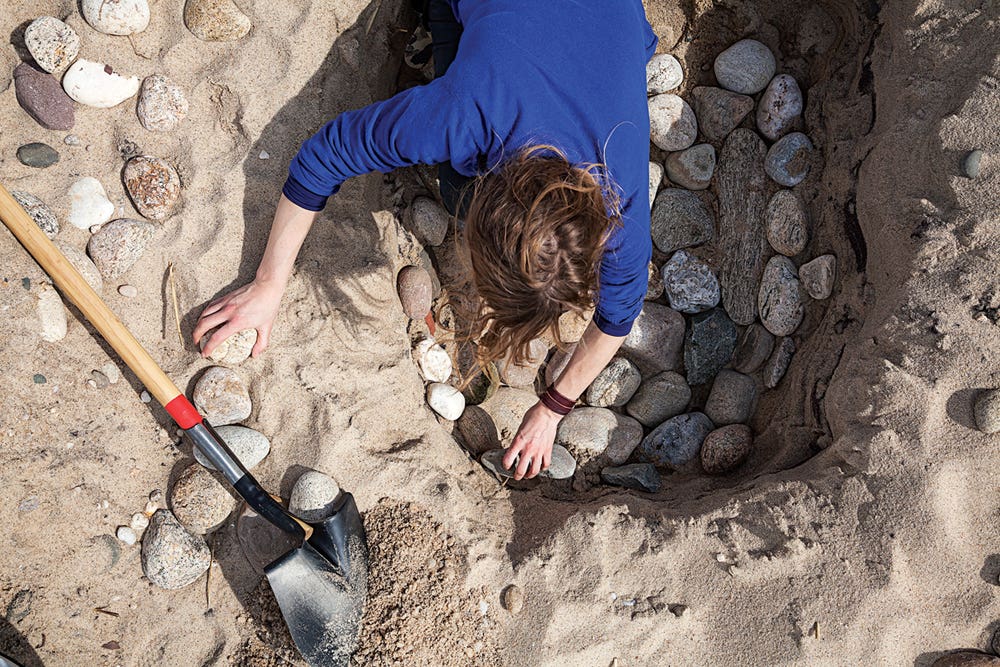
If you’re cooking on a public beach, bring the required permits. Choose a level spot above high tide; dig a three-by-four-foot pit about two and a half feet deep. Using the back of the shovel (see Clambake Toolbox), pack the sand around the pit to form walls. Line the bottom and halfway up the sides with dry softball-size rocks you’ve brought with you or have scavenged from the beach.

clambake, tools, kitchen, techniques, how-to, seafood
Step 2

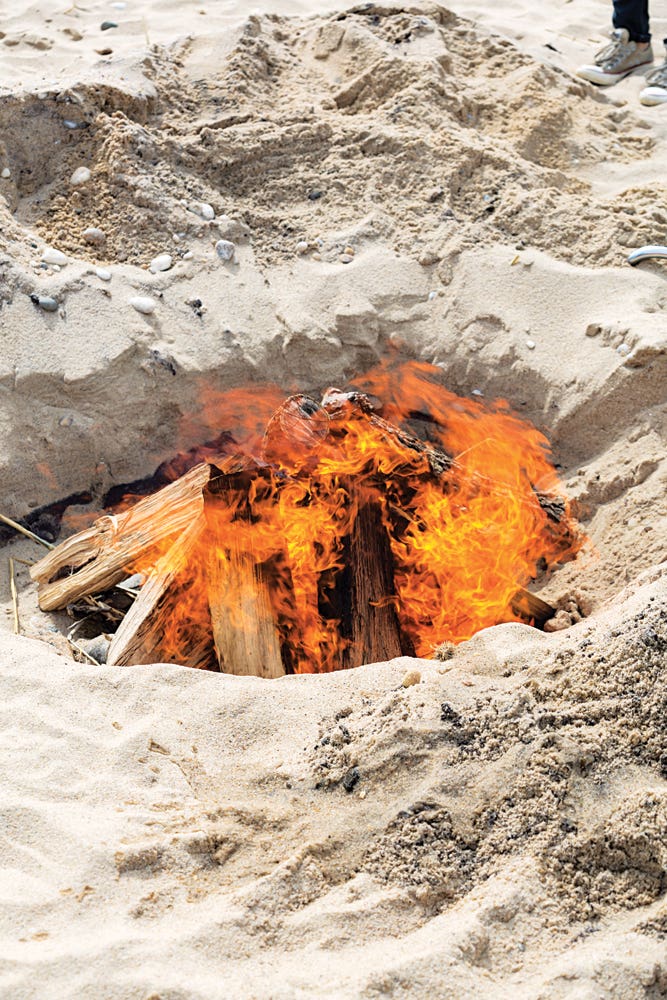
Arrange 10 to 15 two-foot logs in a tepee shape over the top of the rocks. Stuff balled-up newspaper between the logs and light a fire. As the logs burn down, keep feeding the fire with fresh logs, making sure all the rocks remain covered. Burn the logs to charcoal-size embers, about three to four hours. Use the shovel or a rake to spread the embers evenly over the rocks.

clambake, tools, kitchen, techniques, how-to, seafood
Step 3

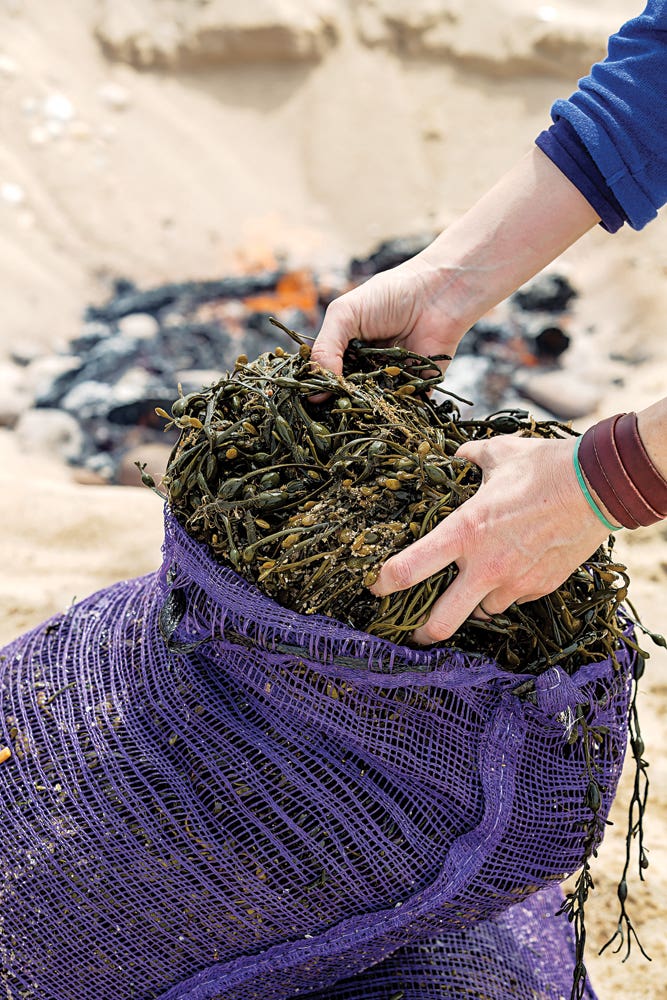
Working quickly, line the bottom of the pit with a two-inch layer of tide-soaked seaweed you’ve bought or gathered from the beach.

Step 4

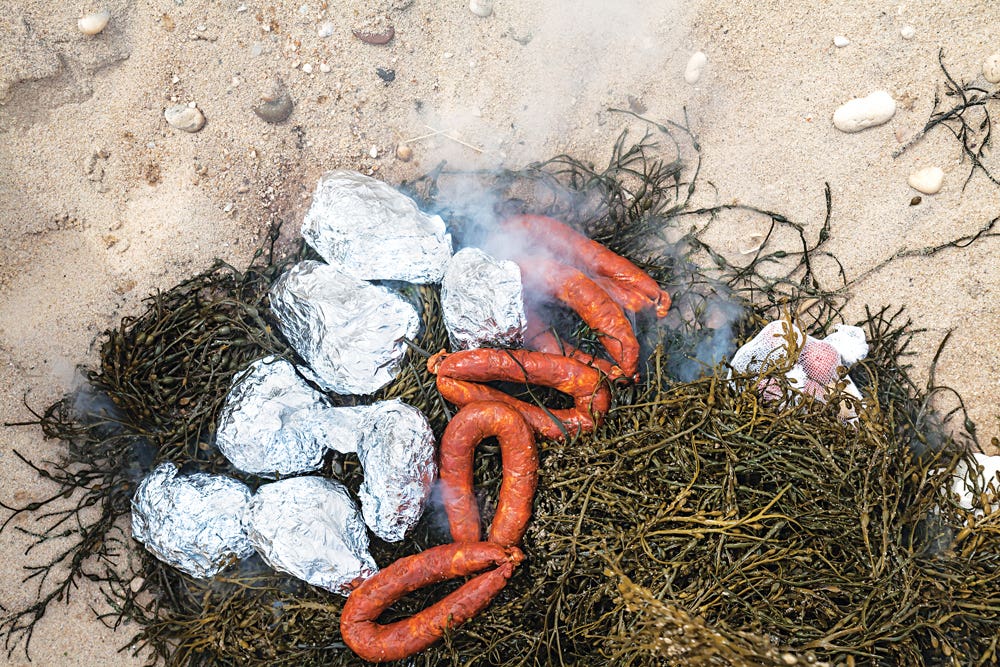
Arrange slower-cooking foods in an even layer over the seaweed: rings of Portuguese chouriço or Italian sausage (three to six pounds); seasoned chicken quarters (three to six pounds) wrapped in a double layer of aluminum foil; and mesh bags full of new potatoes and peeled pearl onions (two to three pounds each).

clambake, tools, kitchen, techniques, how-to, seafood
Step 5

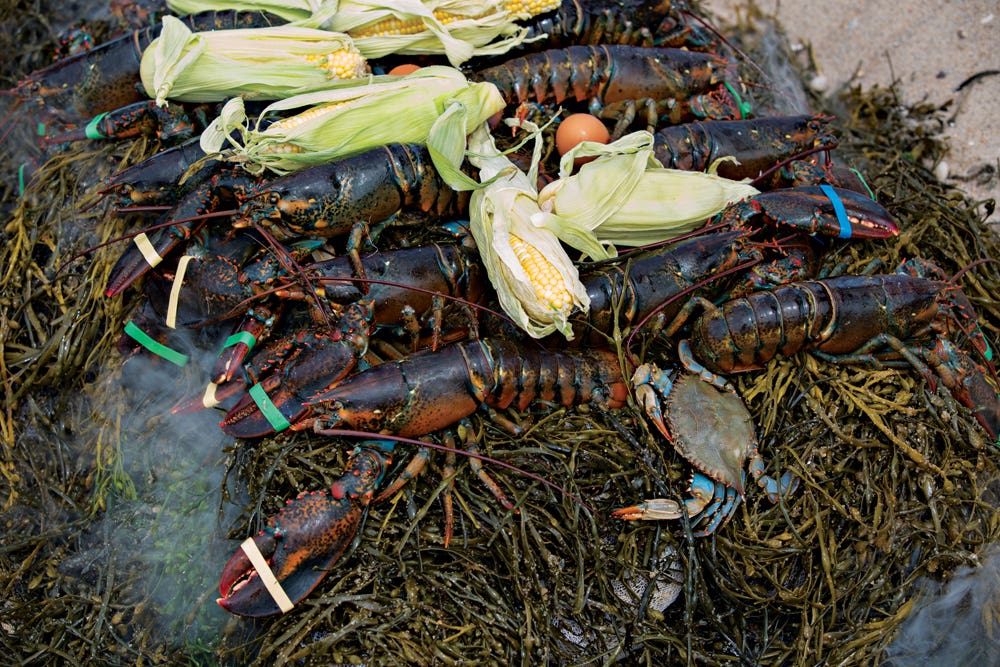
Add another layer of seaweed and place faster-cooking items on top: lobsters and crabs; ears of corn with the silks removed and the husks left on (about a dozen each); mesh bags full of mussels and steamer clams (four to six pounds each). Place a few eggs over the top, leaving one within easy reach at a corner so you can test the clambake for doneness.

clambake, tools, kitchen, techniques, how-to, seafood
Step 6

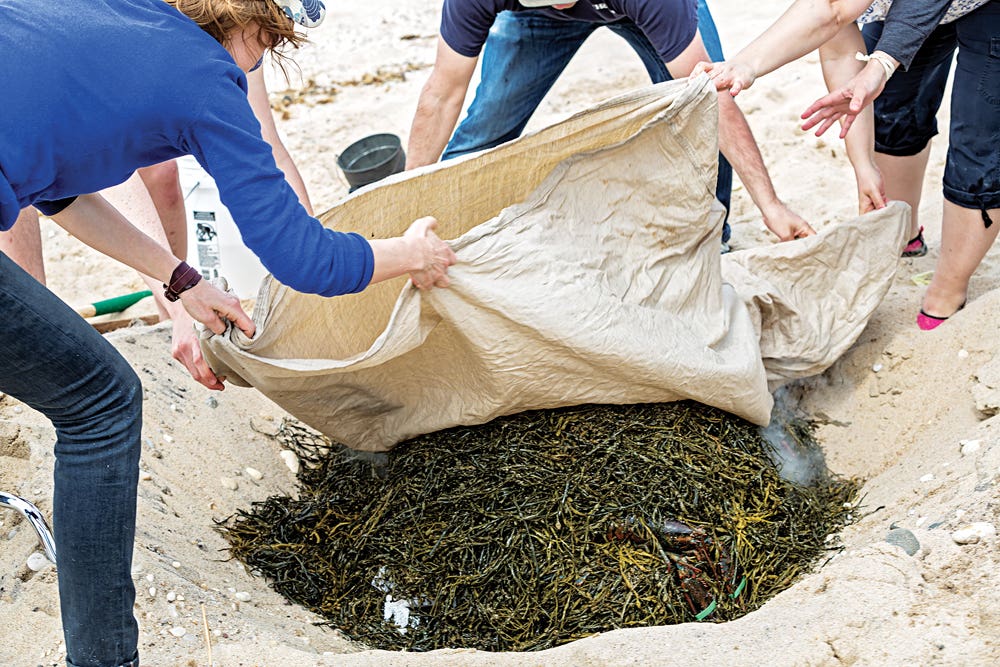
Add another layer of seaweed; cover the pit with a canvas tarp soaked in seawater. Weigh the tarp down at the edges with rocks. Place two pounds of unsalted butter in a small lidded saucepan and place the pan on top of the tarp at the edge of the pit. Set a timer for one hour.

clambake, tools, kitchen, techniques, how-to, seafood, beach
Step 7

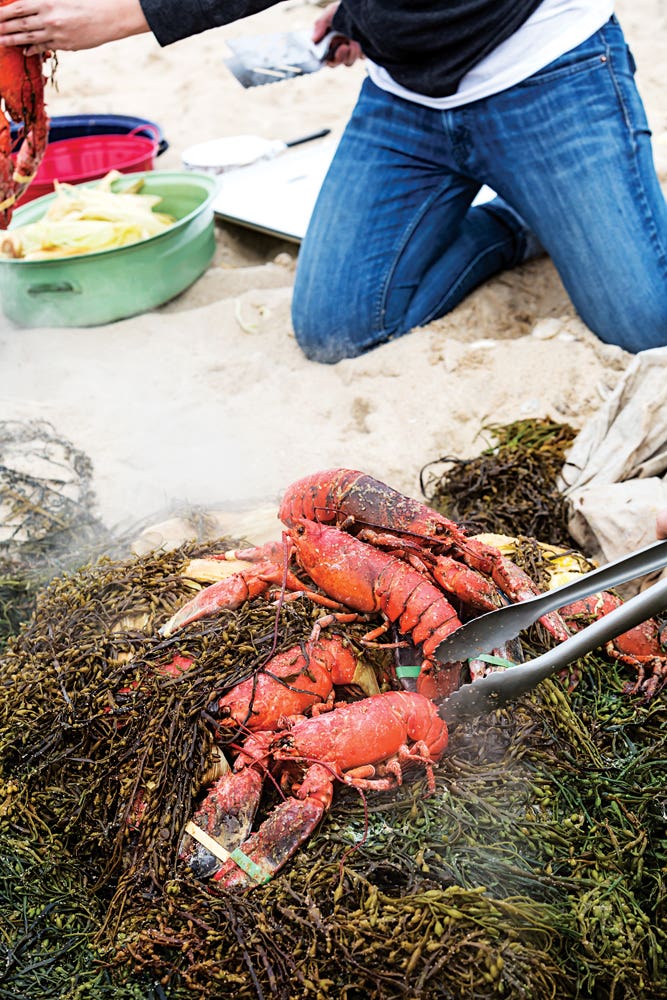
After one hour, use tongs or heatproof gloves to retrieve the egg from the corner. If it is hard-boiled, the clambake is cooked. Carefully remove the tarp, so as not to drag sand over the food. Using tongs or heatproof gloves, transfer the food to serving platters.

PHOTOGRAPHER: INGALLSPHOTO
Techniques

A Seaside Supper

When I was eight years old, one of my dad's pals invited us to a clambake near our home on the Jersey shore. There was a certain drama to the whole thing. Digging the pit, gathering rocks to line it, layering on clams, lobsters—even hot dogs—and covering it with seaweed and a wet tarp. An hour later, when that tarp was lifted, the steam rose ten feet high, releasing an explosion of seafood aromas. It was stunning. What I learned that day is this: No cookout on the planet comes close to a clambake. Here's how to pull one off. —Jasper White

clambake, tools, kitchen, techniques, how-to, seafood, beach, summer
Step 1

If you’re cooking on a public beach, bring the required permits. Choose a level spot above high tide; dig a three-by-four-foot pit about two and a half feet deep. Using the back of the shovel (see Clambake Toolbox), pack the sand around the pit to form walls. Line the bottom and halfway up the sides with dry softball-size rocks you’ve brought with you or have scavenged from the beach.

clambake, tools, kitchen, techniques, how-to, seafood
Step 2

Arrange 10 to 15 two-foot logs in a tepee shape over the top of the rocks. Stuff balled-up newspaper between the logs and light a fire. As the logs burn down, keep feeding the fire with fresh logs, making sure all the rocks remain covered. Burn the logs to charcoal-size embers, about three to four hours. Use the shovel or a rake to spread the embers evenly over the rocks.

clambake, tools, kitchen, techniques, how-to, seafood
Step 3

Working quickly, line the bottom of the pit with a two-inch layer of tide-soaked seaweed you’ve bought or gathered from the beach.

Step 4

Arrange slower-cooking foods in an even layer over the seaweed: rings of Portuguese chouriço or Italian sausage (three to six pounds); seasoned chicken quarters (three to six pounds) wrapped in a double layer of aluminum foil; and mesh bags full of new potatoes and peeled pearl onions (two to three pounds each).

clambake, tools, kitchen, techniques, how-to, seafood
Step 5

Add another layer of seaweed and place faster-cooking items on top: lobsters and crabs; ears of corn with the silks removed and the husks left on (about a dozen each); mesh bags full of mussels and steamer clams (four to six pounds each). Place a few eggs over the top, leaving one within easy reach at a corner so you can test the clambake for doneness.

clambake, tools, kitchen, techniques, how-to, seafood
Step 6

Add another layer of seaweed; cover the pit with a canvas tarp soaked in seawater. Weigh the tarp down at the edges with rocks. Place two pounds of unsalted butter in a small lidded saucepan and place the pan on top of the tarp at the edge of the pit. Set a timer for one hour.

clambake, tools, kitchen, techniques, how-to, seafood, beach
Step 7

After one hour, use tongs or heatproof gloves to retrieve the egg from the corner. If it is hard-boiled, the clambake is cooked. Carefully remove the tarp, so as not to drag sand over the food. Using tongs or heatproof gloves, transfer the food to serving platters.

Continue to Next Story

Want more SAVEUR?

Get our favorite recipes, stories, and more delivered to your inbox.