I’m Lacto-Fermenting All My Late-Summer Produce—And You Should Be Too
It may sound intimidating, but this ancient preservation method is easier than you think.

Plot to Plate is a SAVEUR column in which features editor Alex Testere exercises his green thumb, sharing practical gardening tips and seasonal produce-driven recipes from his patch of earth in New York’s Hudson Valley. He is also the author and illustrator of Please Grow: Lessons on Thriving for Plants (and People).
Autumn has finally arrived in upstate New York: The trees are beginning to release their spent leaves, glinting golden in the pale light; purple asters and feathery goldenrods bob and sway on the roadsides; and the air, devoid of its former humidity, is crisp and cool and ripe with the fragrance of woodsmoke and toasty earth. Frankly, I don’t like it one bit.
Don’t get me wrong, I respect the necessity of autumn. Most temperate climate plants need a dormant phase in order to survive, and this change of seasons is the critical signal for plants to send their energy into their roots—a means of staying safe and sturdy until spring. I appreciate that this transition into the cooler months is an opportunity to harden up, to thicken our figurative bark, growing stronger in the process. And, of course, my ever-growing collection of wool sweaters demands at least three months of the year to sufficiently spend enough time with them all. And so I begrudgingly permit the advance of autumn. But while many vegetables still thrive in the cooler months—broccoli, kale, beets—I have a hard time letting go of the summer garden, with its sun-baked fruits luminescent on the vine and the thrum of bees drifting between blossoms.
Thankfully, generations of farmers and gardeners have honed their skills in capturing the warm season’s bounty, preserving it throughout the year. With the modern luxury of the supermarket, though, most of us today are less concerned with sustenance gardening. We may not rely on the summer’s harvest to nourish us through the barren winter, but that doesn’t mean we don’t appreciate the honeyed burst of a preserved Sungold tomato on a frigid January afternoon. This fall, driven by a fervent desire to bottle up all of last season’s warm tingly sensations lest a single glowing drop slip through my fingers, I’m brushing up on fermentation.
Admittedly, some kinds of preserves can feel a bit fussy, particularly if the goal is shelf-stable pickles, jams, or tomato purées that can last at room temperature for years. (You can read master preserver Camilla Wynne’s excellent guide to waterbath canning here, if you like.) But rather than getting lost in the sauce, I’m thinking more about short-term preservation projects that are just fine to be left in the fridge for a while. I find it takes a bit of the pressure off, and there are fewer things that can go wrong. That’s where lacto-fermentation comes in, a method of preserving that uses salt to encourage the growth of beneficial Lactobacillus bacteria. Even if you aren’t familiar with the term, you’ve likely experienced it in the form of kimchi, sauerkraut, and some kinds of cucumber pickles, all of which are known for their distinct crunch and tart, tangy flavor. It’s a straightforward process that is surprisingly simple (and safe) to execute at home.


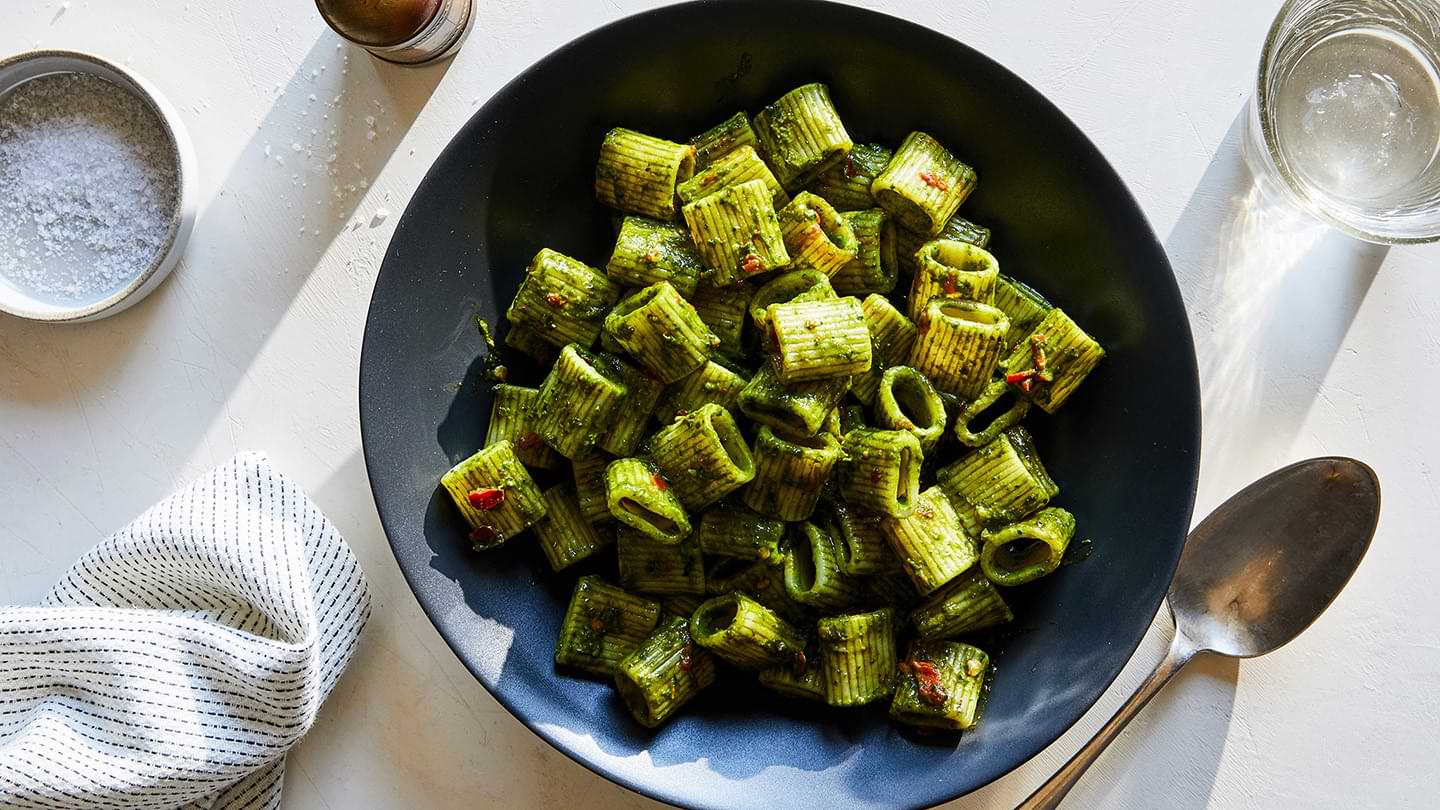
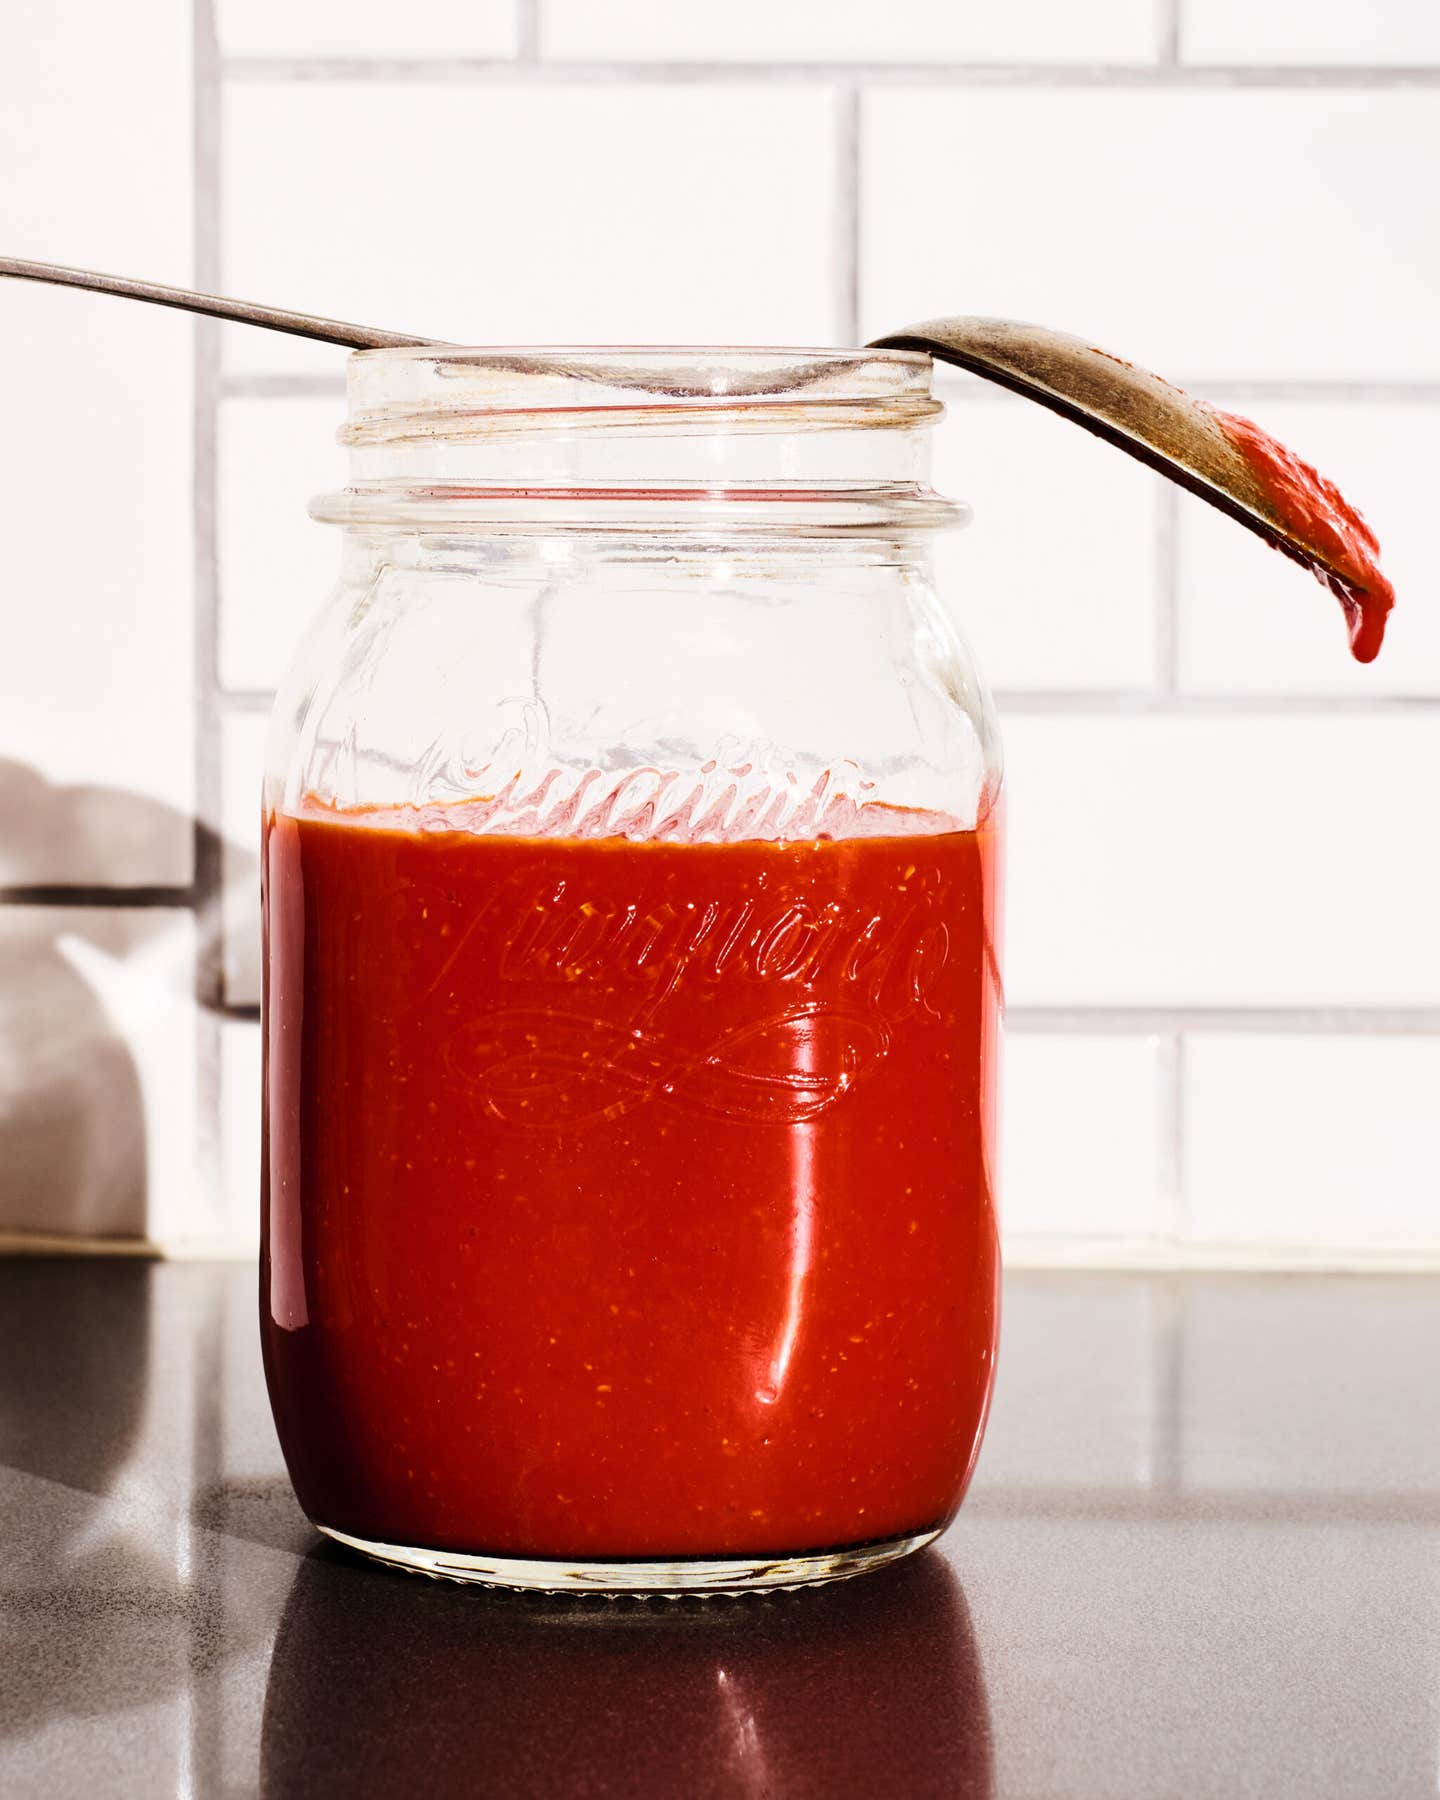
A few weeks ago, after picking up a haul of hot peppers from my local farmers market (deer broke in and devoured my plants at home, a story for another time), I had my heart set on making a fermented hot sauce. I sliced the chiles up in a jar with some garlic, shallot, and carrot, added 2 percent of the mixture’s weight in kosher salt, and set the whole thing aside to work its magic. After a few days’ time and a blitz in the blender, the result was a vivid vermillion spoonable sauce with all the heat of the summer sun. Okay, the heat level was actually closer to that of the Hungarian hot peppers I sourced, but you get the idea. I’ve since been adding a dollop to just about everything—my toast and eggs in the morning; dipping sauces for crispy spring rolls; one-pot macaroni and cheese; the tub of ranch dressing from my local pizza joint—and it’s got me thinking about all the other fruits and vegetables I can still get my hands on now, and how I can hold onto them in the dark months to come. Below are my tips for making the most of your summer produce using lacto-fermentation.
The Basics
Lacto-fermentation is a two-part process. First, salt or a salt brine helps create an environment in which harmful bacteria cannot survive, leaving behind only the beneficial Lactobacillus. Then, these friendly microbes consume the sugars present in your fruits and vegetables and convert them into carbon dioxide and lactic acid, effectively lowering the pH and acting as a natural preservative. You will notice lacto-ferments will get very bubbly as they become more active, and if they’re in an airtight jar, will need to have their lids opened daily to prevent the gases from building up and creating pressure within the vessel. In addition to lending satisfying crunch and tang to any number of garden vegetables, lacto-fermentation also makes for nutritionally rich probiotic foods, which are helpful for digestion and overall gut health.
Equipment
Start by finding some nonreactive vessels such as glass or glazed ceramic. A mason jar will do the trick, but be cautious with the lids and lid rings, as excessive salt and acid can cause the metal to corrode. Weck jars are my personal favorite as they come in a variety of sizes and have glass lids with rubber rings. During fermentation, you can simply remove the rubber ring while leaving the lid on to prevent an airtight seal from forming, enabling any pent-up gases to escape on their own. Fermentation crocks utilize a water seal, which also allows for gases to escape without requiring any “burping.” They also typically come with a set of weights, which can help keep the produce submerged in the brine, preventing it from molding. If you don’t have weights, Heirloom author Sarah Owens suggests using a zip-top bag filled with water, which will easily shrink or expand to fit in most vessels.
Measure Salt by Weight
Salt is a natural antibacterial, though the trace amounts of minerals in it can actually be helpful for certain bacteria, like Lactobacillus, to thrive. The key to successful lacto-fermentation is the proper amount of salt—too much will hinder the growth of all bacteria, including Lactobacillus, and too little will fail to kill off everything else. A good starting ratio is 2 percent salt by weight, though you can generally go up to 5 percent if you’re working with particularly watery produce like cucumbers or tomatoes. If something seems more prone to mold, or if you’re fermenting in a rather warm environment, err on the higher end. Start by weighing the entire amount of produce you plan to preserve, then multiply this number by 0.02 (or up to 0.05 if using a higher percentage) to get your salt measurement. Measure out this weight of salt and add it to your mixture. Any kosher salt will work perfectly for this.

Wet or Dry
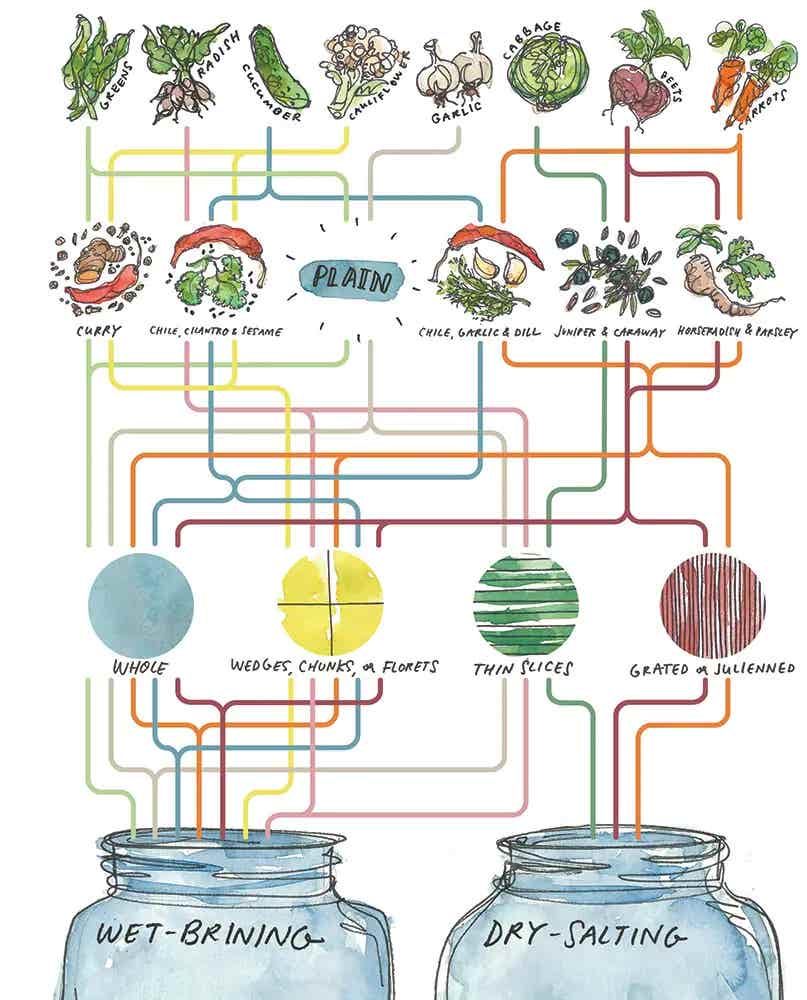
Some ferments, like kimchi, are rubbed with salt and fermented dry, while others, like pickled cucumbers, are preserved in a liquid brine of salt dissolved in water. Both have their appeal depending on what you’re preserving: A dry brine is ideal for shredded produce or vegetables cut into small pieces (such as sliced chiles for hot sauce)—the exposed inner surfaces allow the salt to enter the cell walls, drawing out moisture and creating a brine of sorts in the process. A wet brine works best for vegetables left whole or in larger chunks, like cherry tomatoes, cucumbers, radishes, or cauliflower, but keep in mind that bigger pieces will take longer to fully ferment. A few years back, I illustrated this fermentation matrix to help imagine exciting flavor combinations for a wide variety of vegetables.
A Note on Sterilization
Even kept in the refrigerator, ferments can be much safer (and last longer) with some basic sterilization beforehand, which uses heat to eliminate potentially bad bacteria on your jars and bottles. Camilla Wynne recommends skipping the traditional water boiling and opting for a super simple oven sterilization technique: Place clean bottles, jars, and lids upside down on a sheet tray and bake at 250°F for at least 20 minutes, then allow to cool before using. Home preservers are often quick to worry about botulism, a toxin produced by Clostridium botulinum bacteria, but it requires a low-acid and low-oxygen environment to survive (hence why it can thrive in sweet, vacuum-sealed preserves). Lacto-fermented foods, however, are generally safe from this, as the Lactobacillus produces an abundance of lactic acid, which lowers the overall pH and acts as a natural preservative. When storing preserved or pickled items in the refrigerator or freezer, always give them a smell test before eating, and look for any visible signs of mold. Trust your nose and toss anything that seems off, just to be safe.
Recipe

Keep Reading


Continue to Next Story